
Make a vertical promo for social
You'll make a six-second vertical promo for Reels, TikTok or Shorts: your picture slowly pushing in, a headline, a discount that counts up, and a closing line.
You'll learn how to
- start a vertical project
- fill the frame with a photo, on any format
- make a slow push-in with two keyframes
- show a platform's safe zone and keep text clear of it
- make a number count up
- export a vertical MP4

Before you start: a photo or picture, ideally a tall one, as a JPG, PNG or WebP. These steps use an abstract picture of light rippling over water.
Part 1: Start a vertical project
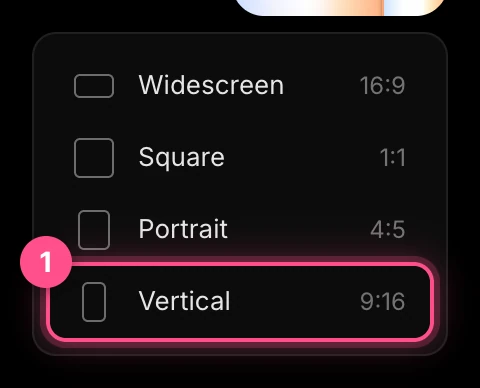
On the home page, click the arrow beside New file and choose Vertical (1).
- In the timeline's header, click the number after Duration, type
6and press Enter.
Part 2: Add your photo
- In the dock, click the Image button and choose your photo. It arrives as a card in the middle of the frame, named after the file.
In the properties panel, set Size W to
100vwand H to100vh(1). These units are hundredths of the frame's width and height, so the photo fills the frame exactly, and keeps filling it if you change the format later.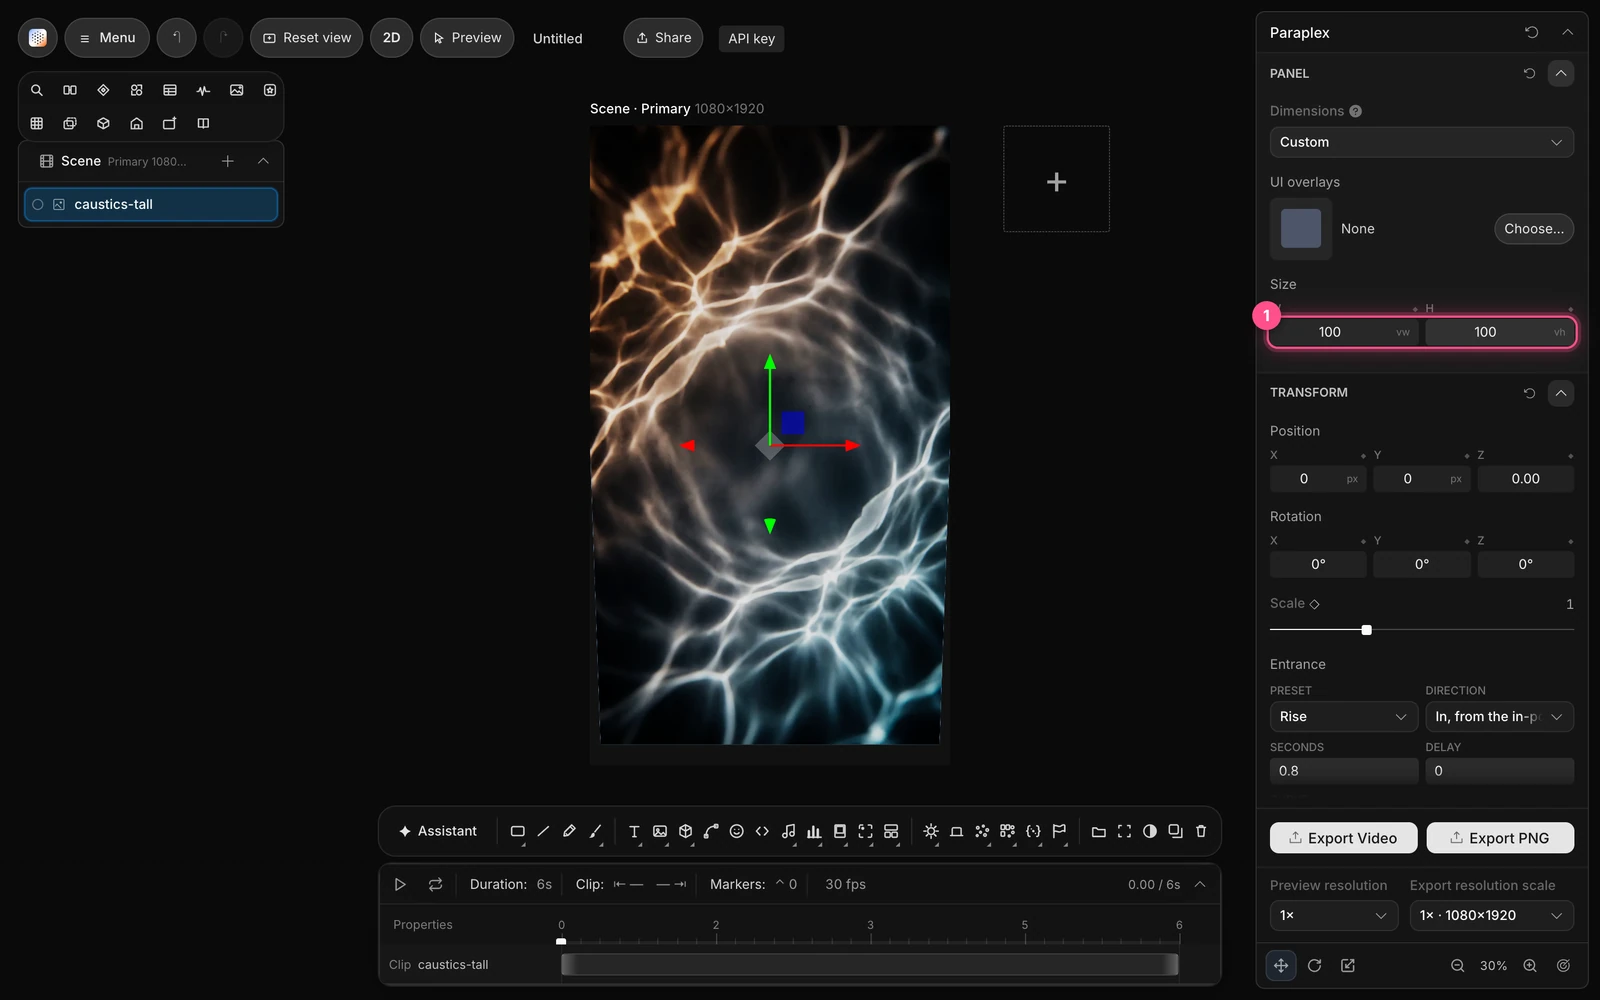
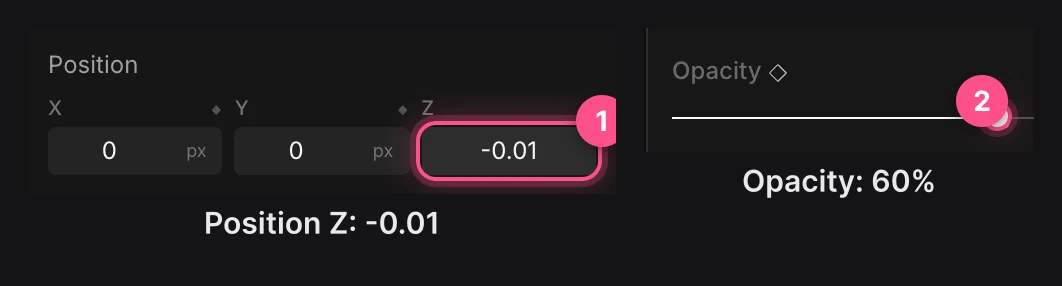
- Set Position Z to
-0.01(1). That puts the photo just behind everything you add next. - Set Opacity to
60%(2): click the number beside it and type60. The photo fades toward the dark background, so white text stands out on it.
Note
What's in front is decided by depth, not by the order of the Layers panel. Layers at exactly the same depth can flicker through each other, which is why the photo goes back a hair. See Layers panel.
Part 3: Push in slowly
A slow push keeps a still photo alive.
- With the photo selected and the playhead at 0, click the diamond beside Scale.
- Click near the right end of the timeline's rows to move the playhead to the end, or click in the rows and press End.
- Click the number beside Scale and type
1.12. Paraplex adds a second keyframe at 6 seconds.

Press Space: the photo grows slowly for the whole six seconds. See Animation basics.
Part 4: Show TikTok's safe zone
Choose Menu › Safe zones › TikTok. Pink bands now show where TikTok's buttons and captions will cover your video. Keep your text out of them. The bands are only a guide: they're never in your export. See Canvas size and setup.
Part 5: Add the text
Each line is its own text layer. For each one:
- Press Esc so nothing is selected. Then press T, click the frame, type the text and press Esc.
- In Text settings, set the Font and Size, and set Align to Center.
- In the properties panel, set Position X and Position Y.
| Text | Font | Size | Position X | Position Y |
|---|---|---|---|---|
SUMMER SALE | Anton | 150 | -90 | 560 |
0 | Anton | 220 | -90 | 200 |
This weekend only | Inter | 60 | -90 | -260 |
The 0 becomes the counting number in the next part. Position X is -90 because TikTok's buttons cover the right edge, so the clear part of the frame is a little left of center.
Important
Press Esc before each T. With a text layer selected, T edits that layer's words instead of starting a new line.
Part 6: Animate it
- The headline: select Text 1. In Text settings, click Animate, then set Effect to Mask rise. The line rises into view from behind an edge.
The number: select Text 2. In Text settings' Effects row, set Number to Counter (1), From
0and To30(2), Count1.2and Start at0.6(3), and Suffix% OFF(4).
Then, so it pops in first: in Transform › Entrance, set Preset to Pop and click Animate in.
- The closing line: select Text 3. In Entrance, set Preset to Rise and Delay to
1.8, then click Animate in. - Press Space.
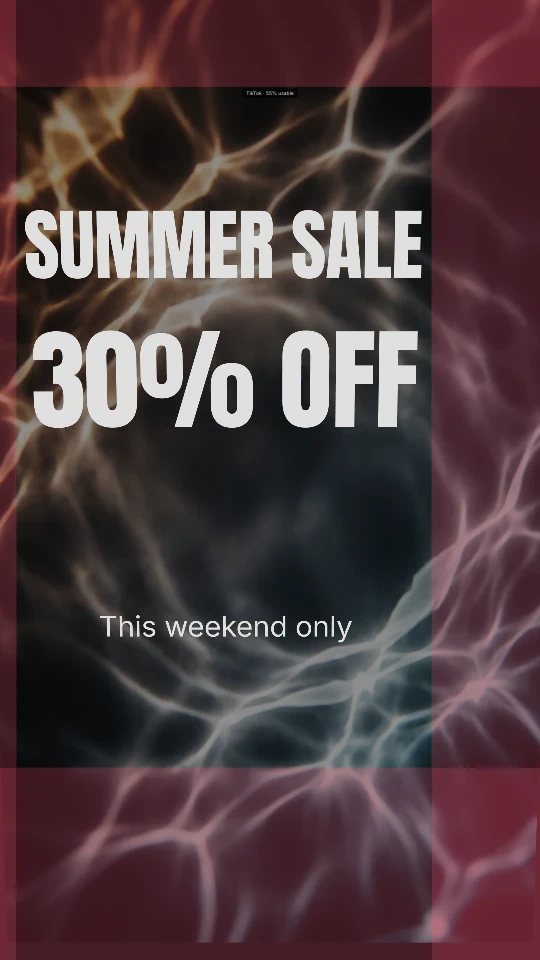
At 2.5 seconds, everything sits inside the clear part of the frame:
Export it
- Click an empty part of the workspace, or press Esc, so nothing is selected.
- Check that Video Export › Format says MP4.
- Click Export Video (1). You get a 1080 × 1920 MP4, ready to upload.
Try this next
- Roll the digits like an odometer: set Number to Odometer. See Text animation.
- Make the same promo square or wide. The photo keeps filling the frame, because of
vwandvh. See Canvas size and setup. - Start from a ready-made vertical piece: the Stat drop (9:16) template. See Templates catalog.
- Next tutorial: Make a 3D product showcase.