
Images and video
A picture or a video can stand in a scene on its own, sit on the face of a card, or wrap round a sphere. Videos play along with the timeline, so they stay in step with everything else when you scrub, play and export.

Add a picture or a video
- In the dock, click Image (1).
- Choose a file. Anything your browser opens works: JPEG, PNG, WebP, GIF, AVIF, MP4, WebM and more.
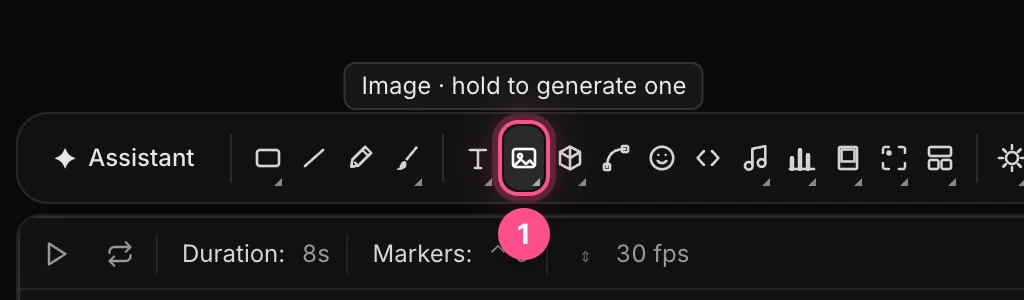
You get a flat picture, named after the file, in the middle of the frame. It shows the picture exactly as it is, untouched by the scene's lights, and the see-through parts of a PNG stay see-through. That makes it the right choice for a logo.
Note
A flat picture cuts its see-through parts out cleanly: anything less than half opaque disappears. A soft glow or shadow baked into a PNG loses its fade.
Or drag files from your desktop onto the canvas. Each one becomes a card instead: thin, glossy, with rounded corners, lit by the scene. Drop several at once and you get a card for each, all in the middle of the frame, so move them apart.
Tip
Press and hold Image to make a picture with AI instead. See Generate images.
Put a picture on a shape
Any shape can wear a picture: a rectangle shows it on its face, and a sphere, cylinder, cone or torus wears it wrapped round.
- Drag a file onto the shape on the canvas. It lands on the shape under the pointer.
- Or select the shape, then in Panel Fill click Add media….
A rectangle takes the picture's proportions, so nothing gets squashed. Give it depth, rounded corners and a material like any card. See Shapes and frames.
Tip
Wrap a world map round a sphere and you have a globe. Use a map in the equirectangular shape, twice as wide as it is tall.
A picture always fills the whole face, trimmed to fit. To zoom into it, raise Media scale in the Panel Surface section, from 1 up to 3.
Drop a picture or a video on a 3D phone or laptop and it goes on the screen. See 3D models and splats.
The media row
Select a layer with a picture and look at the top of Panel Fill.
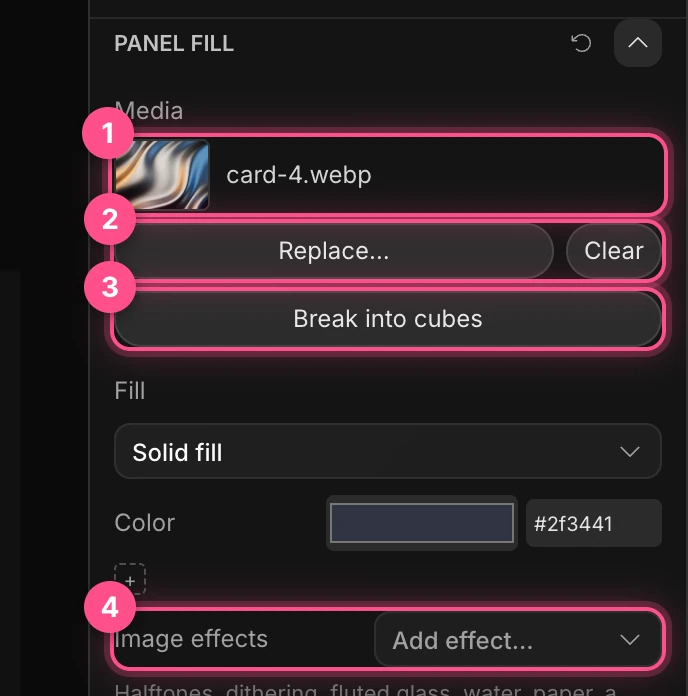
- Media: what's on the layer, with the file's name.
- Replace… swaps in another file and keeps everything else. Clear takes the picture off, and the shape shows its Fill color again.
- Break into cubes turns the picture into falling cubes. See Break a picture into cubes below.
- Image effects add a look over the picture. See below.
Image effects
An image effect changes how the picture looks: printed dots, dithering, ribbed glass, rippling water, old paper. Choose one from Add effect…, and add more to stack them.
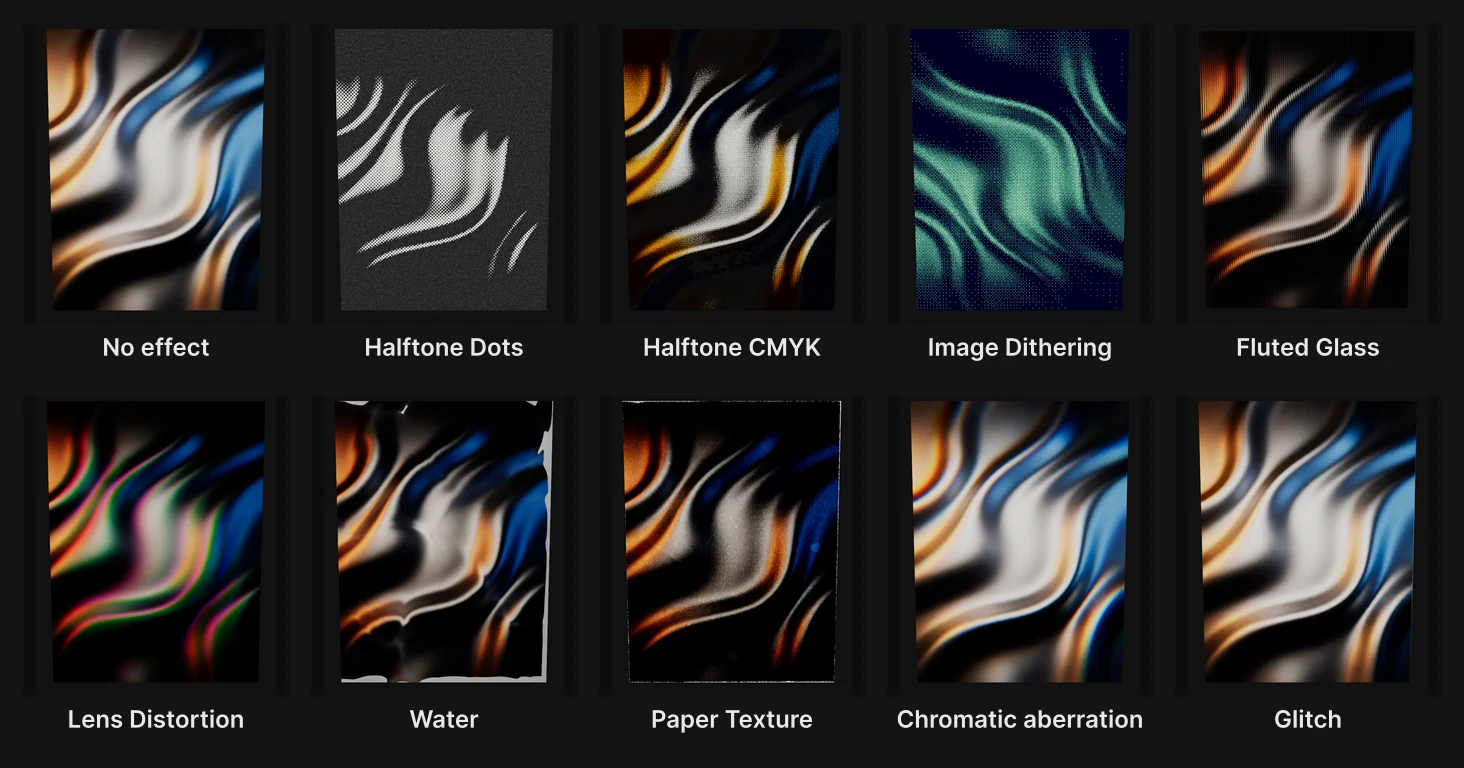
Each effect gets a card of its own. Tick it on or off, move it up or down with the arrows, or remove it with ×. Most of its settings have a diamond, so you can animate them. See Image effects.
Adjust the colors
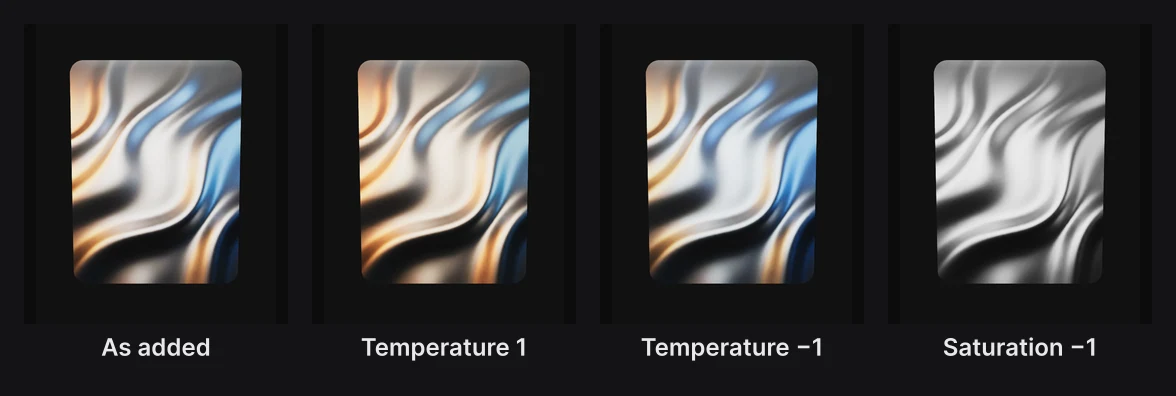
Image adjustments, in the Panel Surface section, grade a picture like a photo app: Exposure, Contrast, Saturation, Temperature, Highlights and Shadows. Each has a diamond, so a picture can warm up or fade to gray over time. Reset sets them all back to 0.
Warning
Image adjustments don't change a flat picture from the Image button yet. To grade one, first set its Panel Material › Preset to Matte. It then catches the scene's light like a card.
To soften a picture, use Layer blur in the Layer Filters section. It works on any layer, and it has a diamond too, so a picture can come into focus.
Break a picture into cubes
Break into cubes turns a picture into cubes of its colors that crumble from the bottom and fall into a heap.
- Put the playhead where the picture should fall apart.
- Select the picture, and in Panel Fill click Break into cubes.
It takes a few seconds. Then a new 3D model layer, named after the picture with "in cubes", takes over at the playhead: the picture's clip ends there and the cubes' clip begins. The fall is worked out once and saved into the model, so it plays the same way every time.
It's for pictures, not videos. To change how many cubes there are, where the fall starts or how fast it goes, ask the assistant. See Physics.
Video
A video is a layer like a picture, with a clip on the timeline (1).

- It plays on the timeline's clock. The video starts from its first frame where its clip starts. Scrub, and you see exactly that frame; export, and every frame is exact.
- A short video loops. If the piece runs longer than the video, the video starts again from the top, so a screen recording keeps going.
- To start it later, drag the start of its clip to the right. There's no setting to begin partway into the video, so trim the file first if you need that.
- Animated GIFs and WebPs move the same way.
Important
Videos play silently: Paraplex doesn't use their sound. To keep a video's soundtrack, save it as an audio file and add it as an audio track. See Audio.
The file is stored inside your project. A long, large video makes the project large too, so trim it to the part you need before you add it.