
Layers panel
The Layers panel on the left lists every layer in your scene. Use it to select layers, rename them, sort them into groups, and hide or isolate them while you work.
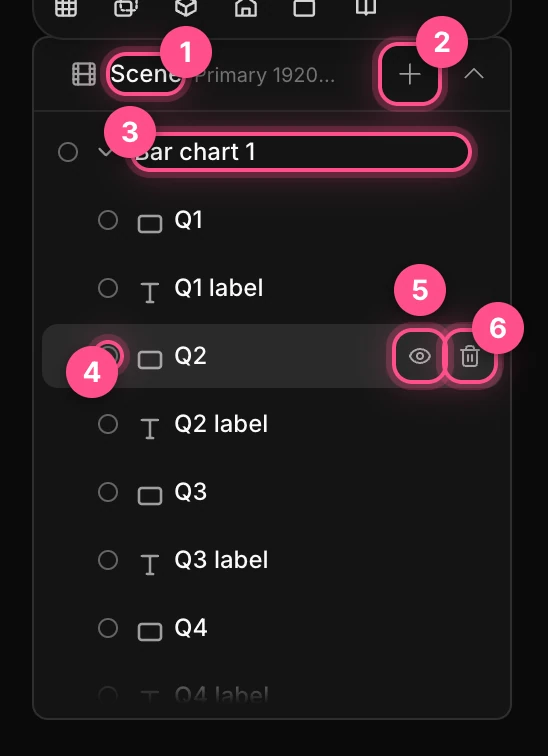
- Scene: the scene's own settings
- Add layer (+): a quick menu of things to add
- A group, with its arrow to open or close it
- Label color: a color tag for organizing
- Hide (shown when you hover a row)
- Delete (shown when you hover a row)
The Scene row
Click Scene at the top of the list to edit settings that apply to the whole piece: canvas size, background, environment and lighting, camera, filters and more. The row also shows the canvas size, such as Primary 1920×1080. Primary is the main version of your scene, as opposed to the other formats.
Right-click the Scene row for Add transition…, Add effect…, Camera move…, Add a note and Feedback for the assistant….
Select layers
- Click a row to select that layer.
- Shift-click or ⌘-click (Ctrl-click) more rows to add them to the selection. Click a selected row the same way to take it out. There's no range select.
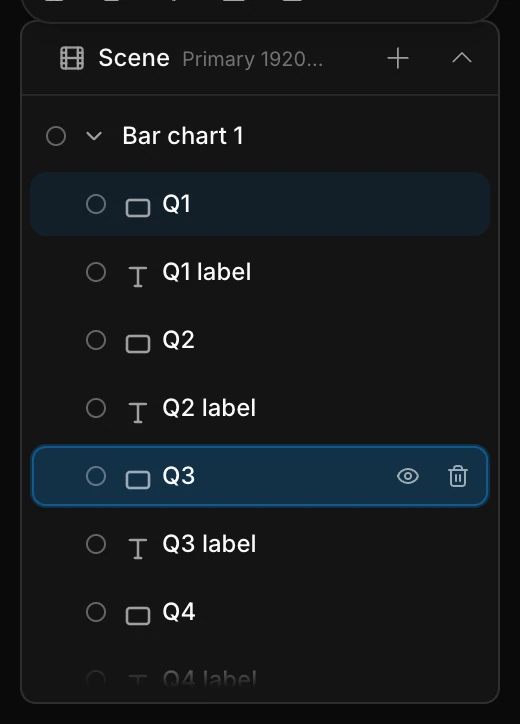
The last row you click is the primary selection, drawn brighter with a ring. Some tools, like Text settings, work on it alone.
With several layers selected, changes you make in the properties panel apply to all of them, except their position. Dragging a gizmo moves them all together.
Tip
Clicking rows works even while the animation plays. Clicking on the canvas doesn't, so pause first.
To select every top-level layer at once, deselect everything, right-click an empty part of the canvas and choose Select all.
Rename a layer
Double-click the layer's name, type a new one and press Enter. Press Esc to cancel. You can also right-click the row and choose Rename.
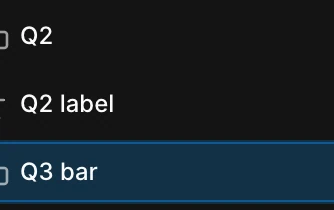
Good names pay off later: search finds layers by name, and so does the assistant.
Reorder layers
- Drag a row up or down. A thin line shows where it will land.
- Or right-click it and choose Move in list › then To top, Up, Down or To bottom. These keep the layer inside its group.
Important
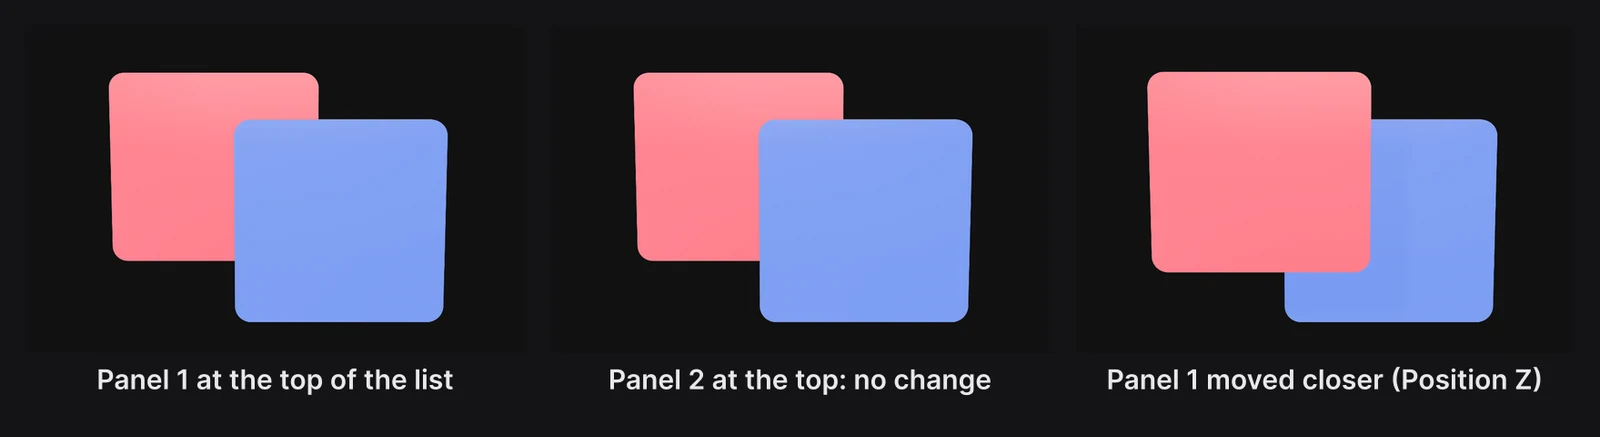
The order of the list doesn't decide what's in front. Every Paraplex scene is 3D, so a layer closer to the camera covers the layers behind it. To bring a layer forward, raise its Position Z in the Transform section. A small change, such as 0.01, is enough.
Group layers
A group holds layers, so they move, fade and animate together. There's no shortcut for grouping. Use one of these:
- Make a group, then drag layers into it. Click + at the top of the panel and choose Group (or use the dock's Group button). Then drag layers onto the group's row: drop on the middle of the row to put a layer inside.
- Pre-compose: select several layers, right-click and choose Pre-compose to wrap them in a new group in one step. A pre-composed group is drawn as one flat picture, so it fades and blends as a whole. See Groups and pre-composition.
- Add auto layout: wraps the selected layers in a group that arranges them in a row or column. See Layouts and bentos.

Click the arrow beside a group's name to open or close it. To take layers out of a group, drag them out. There's no Ungroup command.
Important
A new group lines up the layers you drag into it in a row, so they can jump sideways. To keep them where they were, select the group and set Group Rig › Arrangement to Stack. See Groups and pre-composition.
Hide and isolate layers
- Hide: hover the row and click the eye. Hidden layers stay in the project but don't show in the canvas or in exports. Hiding a group hides everything in it.
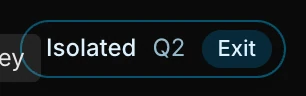
- Isolate: right-click a layer and choose Isolate. Only that layer shows until you exit. Right-click another layer and choose Add to isolation to show it too.
While layers are isolated, a pill at the top of the screen names them. Click its Exit button to show everything again.
Warning
Isolation applies to exports too, and it's saved with your project. Exit isolation before you export, or your video will show only the isolated layers.
Label layers with colors
Click the small circle at the left of a row and pick one of eight colors. The row gets a colored dot and a colored edge. Click ✕ to clear it.
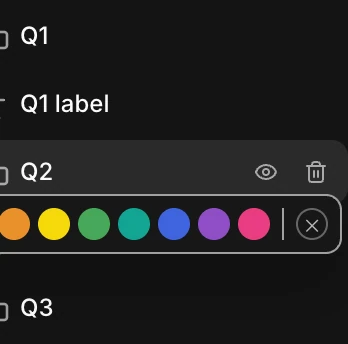
Label colors are only for organizing the list. They don't change the scene.
Delete a layer
Hover the row and click the trash button, or right-click and choose Delete layer. Deleting a group deletes everything inside it. There's no confirmation, but undo (⌘ Z) brings it back.
The ⌫ key doesn't delete layers. It only deletes a selected keyframe.
The right-click menu
Right-click any row for more actions. What you see depends on the kind of layer.
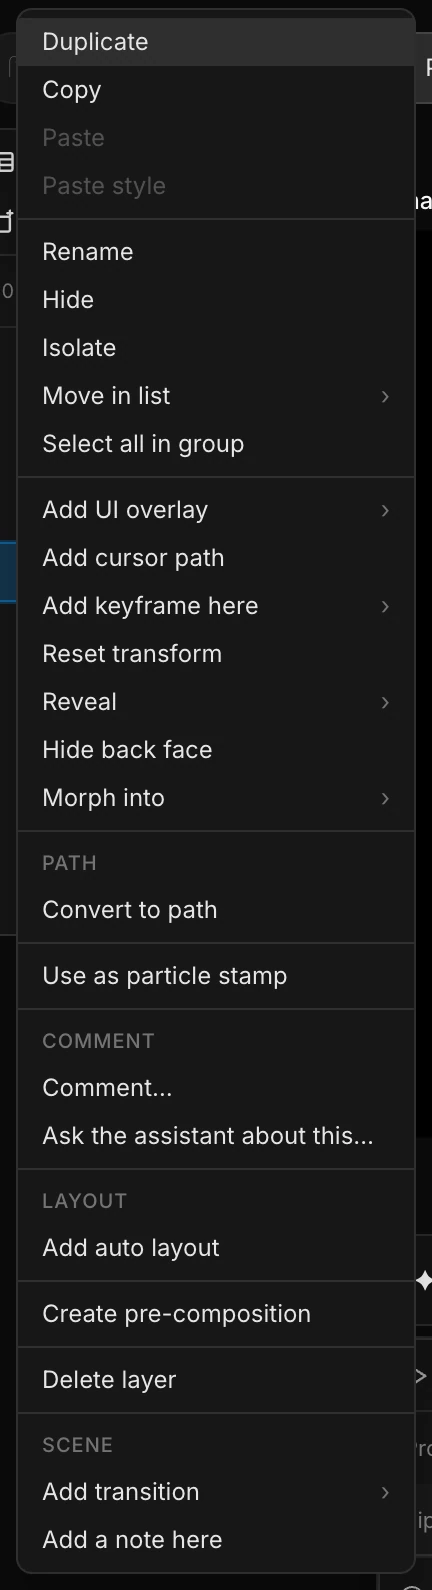
| Item | What it does |
|---|---|
| Duplicate, Copy, Paste, Paste style | See Copy, paste and duplicate |
| Rename, Hide, Isolate, Move in list › | As described above |
| Select all in group | Selects this layer and the others beside it in its group |
| Add UI overlay ›, Add cursor path | Dress a shape as a browser or phone, or add a pointer. See UI overlays and cursors |
| Add keyframe here › | Keyframes the layer's position, rotation, scale or opacity at the playhead |
| Reset transform | Puts position and rotation back to 0 and scale back to 1 |
| Reveal › | An iris or lens reveal, starting at the playhead |
| Hide back face, Reflective floor, Morph into › | Shape tricks: hide the back, mirror the shape in a floor, or morph it into another shape |
| Convert to path | Turns a shape or text into an editable vector path |
| Use as particle stamp | Makes particles look like this layer |
| Comment…, Ask the assistant about this… | Start a feedback thread, or a chat about this layer |
| Add auto layout, Create pre-composition | Group the selection, as described above |
| Delete layer | Deletes the layer you right-clicked |
| Add transition ›, Add a note here | Scene-wide extras |
With several layers selected, Duplicate, Copy, Isolate, Comment, Add auto layout and Pre-compose act on all of them. Most other items act on the row you right-clicked.