
Media frames and HUDs
Media frames give a picture a physical home: a Polaroid with a handwritten caption, a photo torn from a magazine, an old computer window. HUDs are the overlays a camera draws on its screen, like a camcorder's REC and timecode, which make a scene look like footage.
Add a media frame
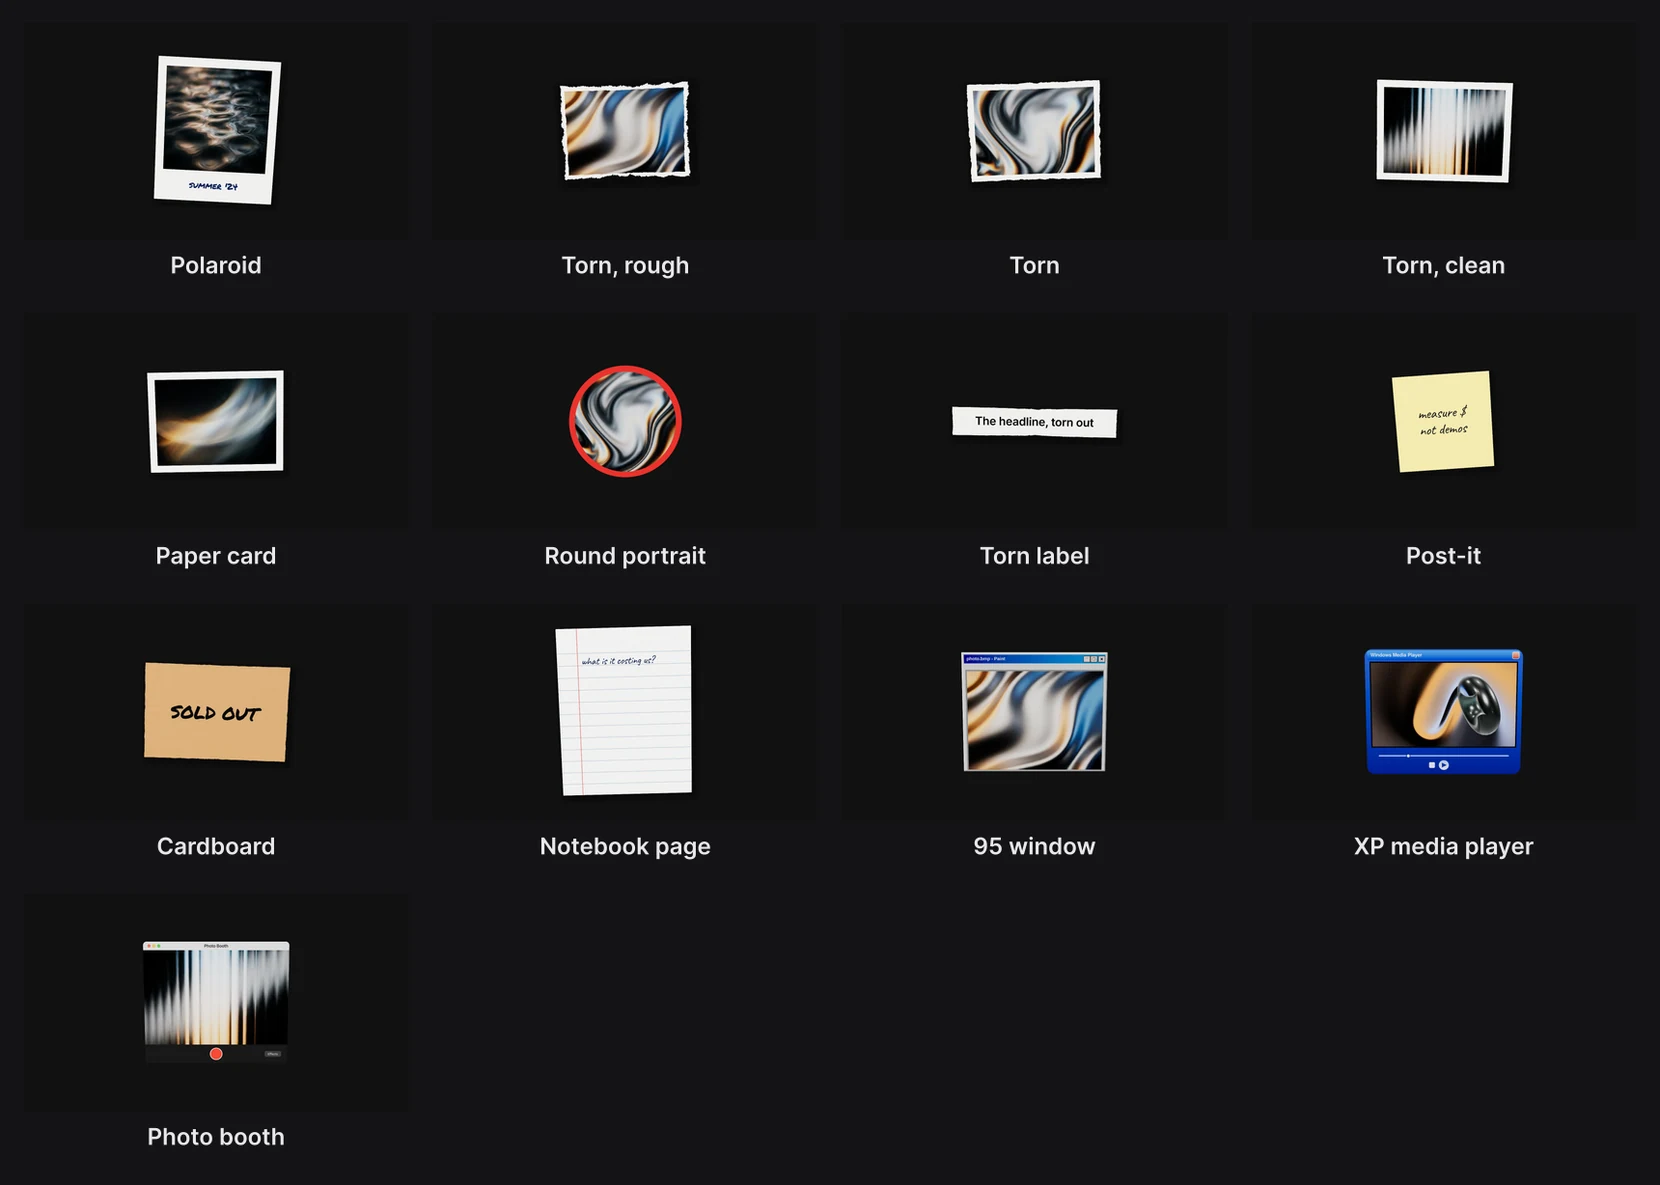
Click Media frame in the dock for a Polaroid. Press and hold it to choose one of thirteen:
| Family | Frames |
|---|---|
| Photo | Polaroid (with a caption), Torn, rough, Torn, Torn, clean, Paper card, Round portrait |
| Paper | Torn label (a newspaper headline), Post-it, Cardboard, Notebook page |
| Window | 95 window, XP media player, Photo booth |
A frame arrives in the middle of the frame, turned a few degrees as if dropped by hand. It's a group of ordinary layers: the paper, the picture, the caption, the window's parts. Change any of them like any layer.
Put your picture in
Photo and Window frames come with a placeholder picture. To use your own, drag your picture or video file onto the frame on the canvas. It lands in the frame's picture slot, filling it, trimmed to fit.
Or select any part of the frame and click Panel Fill › Replace…. To zoom into the picture, select its layer ("Photo" or "Picture") and raise Panel Surface › Media scale.
Note
Paper frames have no picture slot: a picture dropped on one changes the paper itself.
Captions that write themselves
The Polaroid, Post-it, Cardboard and Notebook captions write themselves on, letter by letter, as if by hand.

To change the words, double-click the caption and type. It's a text layer with a text animation, so its timing and style are in Text settings.
Note
The writing starts near the beginning of the timeline, even when the frame appears later, so a frame that arrives later shows its caption already written. Ask the assistant to start the caption's animation later, for example "Start the Caption's text animation at 3 seconds". See Text animation.
The torn edge is a setting any rectangle has: Panel Surface › Corner shape › Torn. See Shapes and frames.
HUDs
Click HUD in the dock for a camcorder's display. Press and hold it to choose one of four:

| HUD | What it adds |
|---|---|
| Camcorder REC | A blinking red dot and REC, a battery, a running timecode, and the tape mode |
| Viewfinder | A camera's focus brackets in the middle, and its exposure readout along the bottom |
| 16 mm film frame | Black bars with sprocket holes and the film's edge print |
| Date stamp | Today's date in orange digital numbers, as old point-and-shoot cameras burned into the corner |
Every piece is pinned to the frame, so it holds its corner on a vertical video, a square post and every other format. See Pin to frame. The pieces are ordinary text and shapes: double-click the date to change it, or recolor the readouts.
Note
Removing a HUD with undo takes one press of ⌘ Cmd+Z per piece, nine for the camcorder. To remove one in one go, delete its layers in the Layers panel.
For a whole-frame film look, grain, flicker and gate weave, see Filters and film.