
The timeline
The timeline is the strip under the canvas. It plays your piece, shows where you are in time, and holds every keyframe and clip.
The header

- Play and pause. Space does the same.
- Loop: repeat the piece while it plays.
- Duration: how long the piece is. Click the number to change it (1 to 60 seconds).
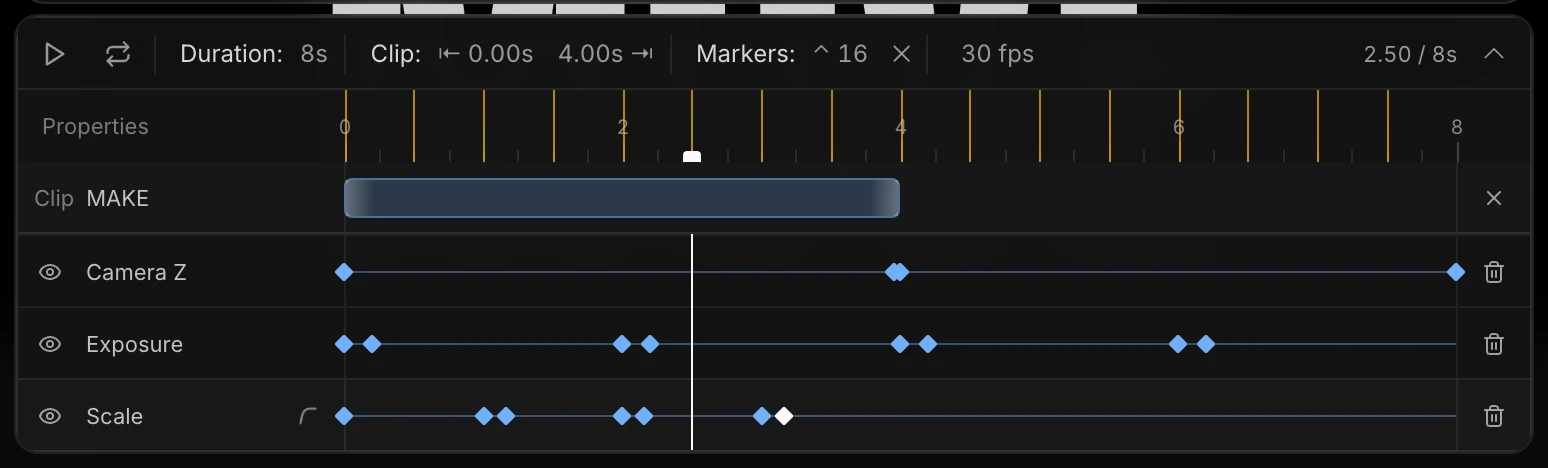
- Clip: the selected layer's start and end. The ⇤ and ⇥ buttons set them to the playhead. See Clips and transitions.
- Markers: add a marker at the playhead. The count shows how many there are, and a × appears to clear them.
- Frame rate, such as 30 fps. Click it to change. See Canvas size and setup.
- Current time and total length.
- Collapse or expand the timeline.
The rows
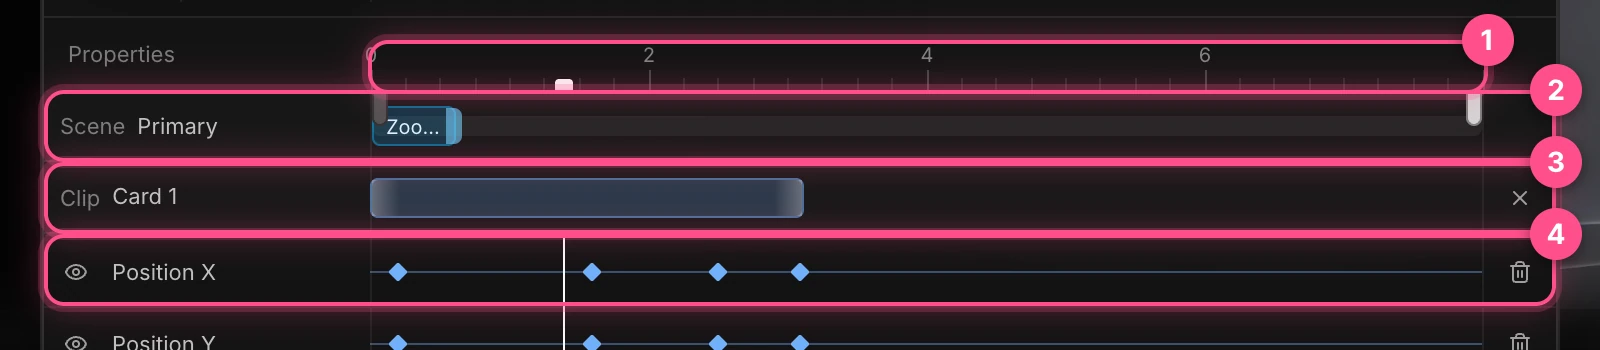
- The ruler, marked in seconds. The white handle on it is the playhead, the moment you're looking at. Drag it to move through time.
- The Scene row: the whole piece, with any scene transitions at its start and end. It appears once the piece has a scene transition, or while you're working on an artboard. See Clips and transitions.
- The Clip row: when the selected layer appears and disappears. Drag the bar's ends to change it.
- Keyframe lanes: one row for each animated setting, with a diamond for each keyframe. The eye at the left dims that lane, so you can focus on the others. It doesn't change the animation. The trash at the right deletes the whole lane.
Hover a diamond to see its value. To select, move and delete keyframes, see Editing keyframes.
The scene timeline
With nothing selected, the timeline shows every layer as a row: its clip as a bar, and a diamond wherever it has keyframes. The number beside each name counts its keyframes.
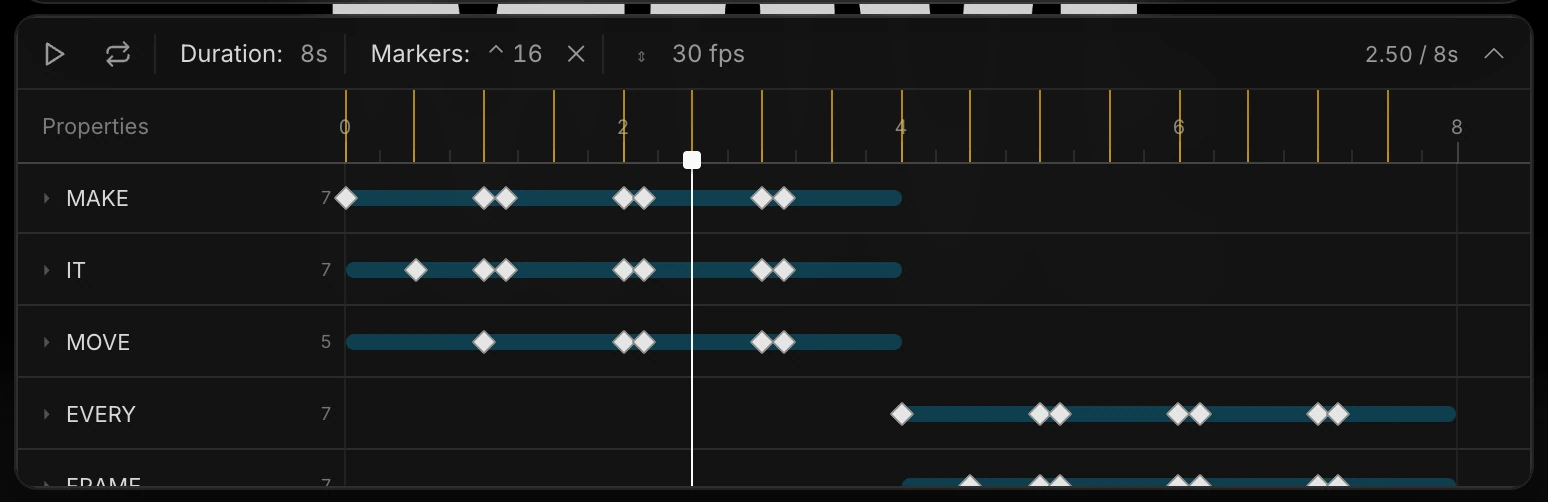
It's the overview of your whole piece:
- A white diamond is one keyframe. A blue diamond is several keyframes at the same moment, such as Position X, Y and Z.
- Drag a diamond to move all of that layer's keyframes at that moment together.
- Click a row's name to select its layer. The timeline then shows only that layer's clip and lanes, ready for detailed editing. Press Esc, or click an empty part of the canvas, to go back to every layer.
To see more layers at once, drag the ⇕ grip in the header up. Double-click it to go back to the usual height.
The Scene has lanes of its own, for the camera and other scene settings. Select Scene at the top of the Layers panel to see them above the layer rows.
Markers
Markers are thin yellow lines on the ruler, at moments that matter, such as the beats of your music. When you drag or trim a clip, it snaps to the markers. Keyframes don't snap.
- Click the Markers button, or press M, to add one at the playhead.
- Use Detect beats on an audio clip to add a marker on every beat. See Syncing to audio.
- Click the × beside the count to clear them all. There's no way to remove a single marker.
Collapse the timeline
Click the arrow at the right of the header to fold the timeline down to its header. You get more room for the canvas. Click it again to bring the rows back.
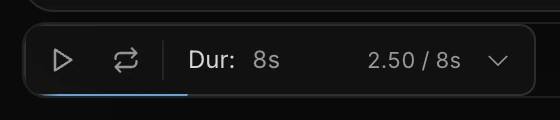
On the collapsed timeline, drag along the thin line at its bottom edge to move the playhead.
Important
Keep the timeline expanded while you animate. The frame-rate button, and the keyframe diamonds beside sliders and colors, only show while it's expanded.
Move through time
- Drag the playhead's handle along the ruler.
- Click anywhere in the rows below the ruler to jump there. Clicking the ruler itself does nothing.
- Press Space to play and pause.
- After clicking in the rows, the ← and → keys step a quarter of a second, Home jumps to the start and End to the end.
The whole piece always fits the timeline's width, up to the 60-second maximum. If you shorten the piece, keyframes past the new end are kept, drawn at the right edge, and play again if you lengthen it.
Smooth playback
While the timeline stands still and you aren't working, Paraplex draws your piece ahead, frame by frame, the way an export does. A thin green bar under the ruler fills as it goes. Where the bar is green, playback shows those frames, so it runs at full speed however heavy the scene.
- Any change you make clears the bar. It fills again a moment after you stop.
- The frames are drawn at your piece's frame rate, as sharp as your Preview resolution at the bottom of the properties panel, up to the canvas size.
- A scene with a code layer, and Preview mode, always play live, so the bar doesn't appear.