
Animate in and out
Animate in and Animate out give any layer a ready-made entrance or exit: a fade, a rise, a pop, a slide or a blur. Paraplex writes ordinary keyframes for you, so you can fine-tune them afterwards like any others.

Where to find it: the Entrance block in the Transform section, with a layer selected.
Add an entrance
- Select the layer.
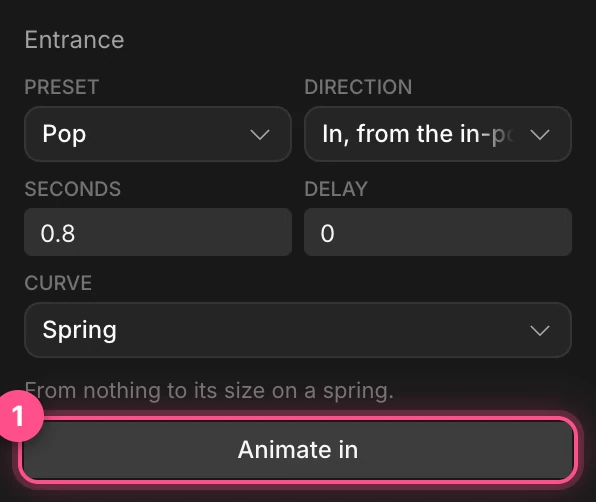
- In Transform › Entrance, open Preset and pick an animation.
- Leave Direction set to In, from the in-point.
- Adjust Seconds, Delay and Curve if you like.
- Click Animate in (1).
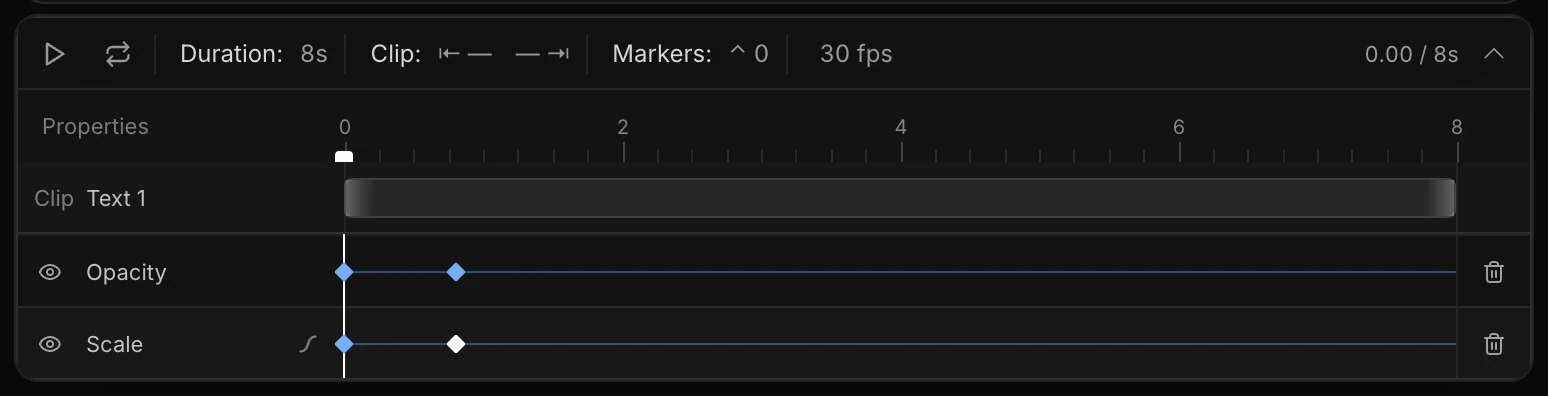
The layer now animates in when its clip starts. Its new keyframes appear on the timeline. Pop, for example, animates opacity and scale:
Add an exit
Do the same with Direction set to Out, to the out-point. The animation then plays backwards into the layer's out point, so it leaves the frame when its clip ends.
The presets
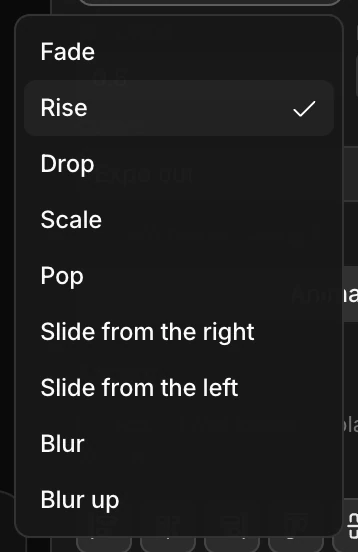
| Preset | What it does |
|---|---|
| Fade | Fades in from nothing |
| Rise (the default) | Moves up from below, fading in |
| Drop | Comes down from above and lands on a bouncy spring |
| Scale | Grows from six tenths of its size, fading in |
| Pop | Grows from nothing to full size on a spring |
| Slide from the right and Slide from the left | Slides in from that side, fading in |
| Blur | Goes from soft and dim to sharp |
| Blur up | Rises from below while going from soft to sharp |
Each preset comes with its own curve, and a line under the settings describes what it does. For an exit, every preset plays in reverse.
Settings
| Setting | What it does |
|---|---|
| Preset | The animation |
| Direction | In, from the in-point for an entrance, or Out, to the out-point for an exit |
| Seconds | How long the animation takes. Default 0.8. |
| Delay | How long after the in point the entrance starts, or how long before the out point the exit ends |
| Curve | The easing. The first option is the preset's own curve. The others are Smooth, Snappy out, Expo out, Spring, Spring, bouncy and Linear. See Easing and springs. |
Animate several layers at once
Select several layers in the Layers panel first. The button then reads Animate in (3 layers), for example, and gives every one of them the same entrance in one step. Each layer animates from its own in point.
To make layers arrive one after another, first stagger their in points: drag the start of each clip, or use the Transitions panel's All layers and Stagger. Then apply Animate in. See Clips and transitions.
Change or remove an animation
The keyframes are ordinary keyframes on the layer's own lanes. Drag them on the timeline to retime them, or change their easing. To remove the animation, delete those lanes with their trash buttons, or undo.
Important
The keyframes are written at fixed times. If you move or trim the layer's clip afterwards, they stay where they are, so apply the preset again. When you switch to a different preset, delete the old one's lanes first: a new preset replaces keyframes at the same times but leaves the old preset's other lanes in place.
Tip
For text, the Text settings panel has many more entrances that move letter by letter or word by word. See Text animation.