
Clips and transitions
Every layer has a clip: the stretch of time it's on screen. Trim it to make a layer arrive late or leave early. Then add transitions, either to a layer's clip, so it fades or slides in and out, or to the whole piece, so it opens and closes with a flourish.
Trim a layer's clip

Select a layer. Its clip is the bar in the timeline's Clip row.

- Clip buttons: ⇤ trims the clip to start at the playhead, and ⇥ to end there.
- The clip bar. Drag either end to trim it, or drag the middle to slide the whole clip earlier or later.
- The in transition at the clip's start. See Add a transition to a clip.
- The out transition at its end.
- ✕ removes the trim, so the layer is on for the whole piece again.
Outside its clip, a layer isn't drawn at all, on the canvas or in exports. A group's clip hides everything inside the group.
- Clip ends snap to markers, so you can line layers up with the beat. See The timeline.
- Times are in hundredths of a second. The shortest clip is 0.05 seconds.
- Each trim or slide is one step in undo.
Important
Moving a clip doesn't move the layer's keyframes, including the ones Animate in wrote. If you slide a clip later, apply the animation again. Text animations always start at 0 seconds. See Text animation.
Add a transition to a clip
Drag the dark wedge at either end of the clip bar inward. A fade appears, as long as you drag, and the Transitions panel opens.
In the panel, the On clip rows show the selected layer's transitions:
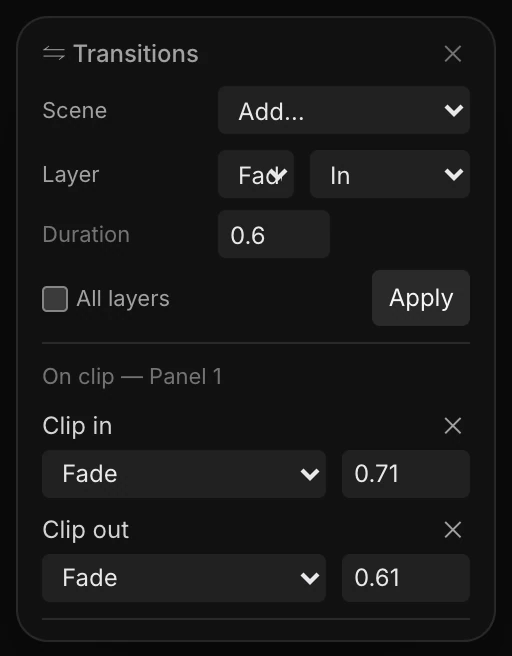
- Change the kind with the list in the Clip in or Clip out row.
- Change the length with the number beside it, or by dragging the wedge.
- Remove it with the row's ✕, or drag the wedge back to the end.
The kinds

| Kind | Coming in | Going out |
|---|---|---|
| Fade | Fades in | Fades out |
| Slide up, down, left or right | Slides a short way that direction, fading in | Plays the slide backwards, so Slide up leaves downwards |
| Zoom | Grows from smaller, fading in | Shrinks, fading out |
| Push up, down, left or right | Travels in from a whole frame away, without fading | Keeps going the same way, so Push up enters from below and leaves at the top |
| Zoom through | Grows from small and blurred to sharp | Rushes past the camera, blurring and fading |
- A layer that isn't trimmed transitions at the start and end of the piece.
- On a short clip, an in and an out that overlap blend together.
- 3D models, blobs and instances slide and scale but can't fade. Lights and adjustment layers ignore transitions. A group fades as one picture.
Add transitions to several layers
The panel's Layer row gives the same transition to many layers at once.
- Select the layers: Shift-click or ⌘-click them in the Layers panel. Or tick All layers.
- Choose the kind, and the edge: In, Out or Both.
- Set Duration (0.6 seconds to start with).
- Click Apply. The button says how many layers it will change.
With All layers ticked, a Stagger setting appears. It makes the layers arrive one after another, in their Layers panel order. It does this by moving each layer's clip start Stagger seconds after the one before. Their clip ends stay put.
Note
All layers means the top-level layers. Layers inside a group follow their group.
Open and close the whole piece
Scene transitions play over the first or last moments of the whole piece: a fade from black, a camera zoom, a film burn and more.

To add one, use any of these:
- The Transitions panel: Scene › Add…. Open the panel from the quick-actions strip or Menu › Transitions › Transitions panel….
- Menu › Transitions ›, then the transition.
- Right-click Scene at the top of the Layers panel and choose Add transition….
The ones named in, from or start play at the beginning. The ones named out, to or stop play at the end.
| Transition | What it does |
|---|---|
| Fade from black, Fade to black | Fades from or to black |
| Fade from white, Fade to white | Fades from or to white |
| Zoom in | The camera starts further back and eases in |
| Whoosh in | The camera flies in from the right, with a sideways streak |
| Motion blur in, Motion blur out | A sideways streak, without moving the camera |
| Glow in, Glow out | Extra glow that eases back to the scene's own, or builds up |
| Burn in, Burn out | A film burn from a corner, out of white or into it |
| Flash frame in, Flash frame out | A flash of white at the cut, then scratches and flicker |
| Projector start, Projector stop | Film flicker and weave that settle as the picture appears, or build as it goes |
| Strip advance in, Strip advance out | The frame slides through, like film through a projector |
Change a scene transition
Once the piece has a scene transition, the timeline shows a Scene row with a chip for each one.

Drag the handle on a chip's inner edge (1) to change its length, from 0.2 to 4 seconds. Click the handle to open the Transitions panel.
Each scene transition has its own entry in the panel:
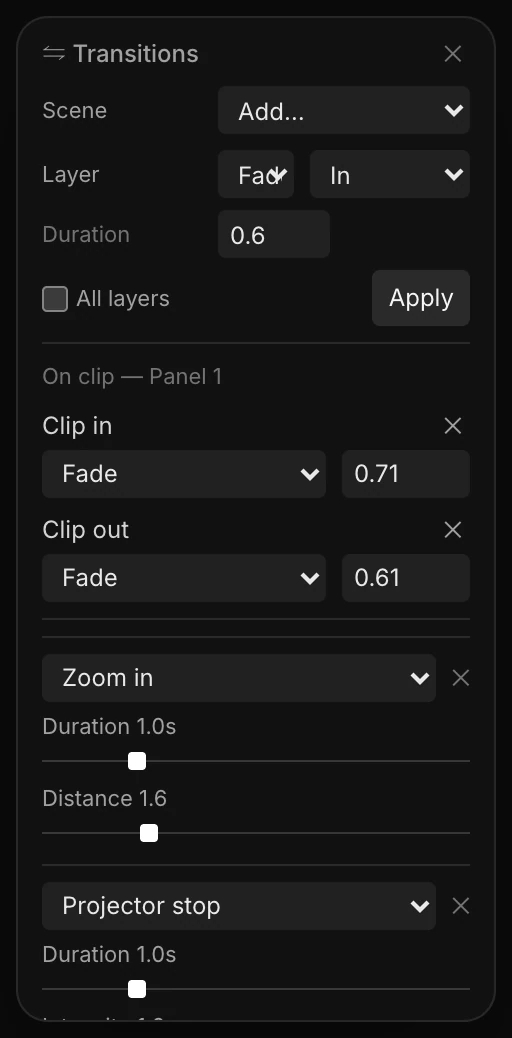
- The list swaps it for another transition and keeps its length.
- ✕ removes it.
- Duration sets its length. Most start at 1 second. Flash frame starts at 0.3.
- Distance (Zoom, Whoosh and Motion blur) sets how far it travels. Intensity (Glow, Burn, Flash frame, Projector and Strip advance) sets how strong it is.