
Moving around the canvas
There are two kinds of movement on the canvas, and it helps to know which is which:
- Moving the camera (orbit and dolly) changes the picture. Whatever the camera sees is what you export.
- Moving your view (scroll and zoom) is like zooming a document. It never changes your scene or your export.
Orbit the camera
Every Paraplex scene is 3D. Drag across the frame to turn the camera around your scene.

- Drag anywhere on the frame to orbit. Dragging the handles of a selected layer's gizmo, or the box around selected text, moves that layer instead.
- Middle-drag to dolly: move the camera closer to the scene or farther away.
Orbiting moves the scene's real camera, the one your export uses. If the camera is animated, an orbit also adds camera keyframes at the playhead.
Important
Camera moves aren't part of undo. To go back, use Reset view, described next.
Reset view and the home view
Reset view puts the camera back to the scene's home view: how the scene opened. If the scene opened with camera motion, as many templates do, it also puts the camera's keyframes back the way they were, which removes any that orbiting added. Use any of these:
- Press F.
- Click Reset view in the top bar.
- Right-click an empty part of the canvas and choose Reset view (F).
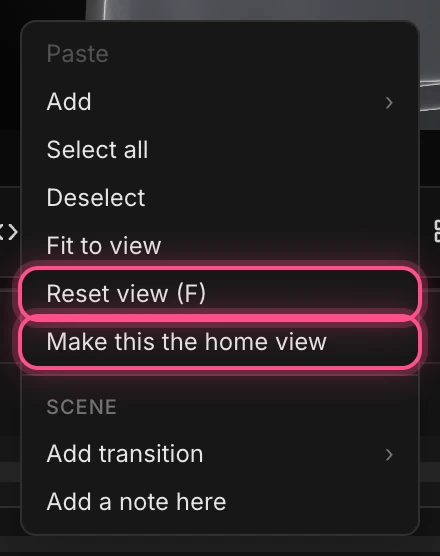
Found a better angle? Make it the new home: with nothing selected, right-click the canvas and choose Make this the home view. From then on, Reset view comes back here. The home view is saved with your project.
Zoom and pan your view
These change only how you see the canvas, so use them freely.
- Scroll to move your view around.
- Pinch on a trackpad, or hold Ctrl and scroll, to zoom in and out around the pointer.
The view controls sit at the bottom of the properties panel:
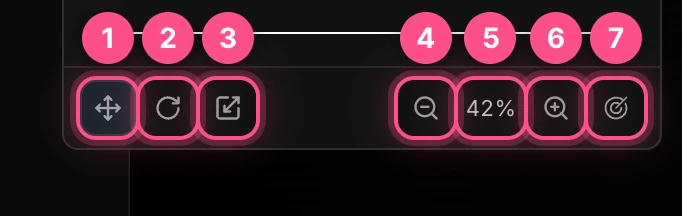
- Move gizmo
- Rotate gizmo
- Scale gizmo
- Zoom out
- The zoom level. Double-click it to go back to 100%.
- Zoom in
- Center canvas: brings the frame back to the middle of the screen
Zoom runs from 25% to 400%. To put the frame back at 100% and centered, right-click an empty part of the canvas and choose Fit to view.
Move, rotate and scale layers
Select a layer by clicking it on the canvas or in the Layers panel. A gizmo appears on it: handles you drag to change it.
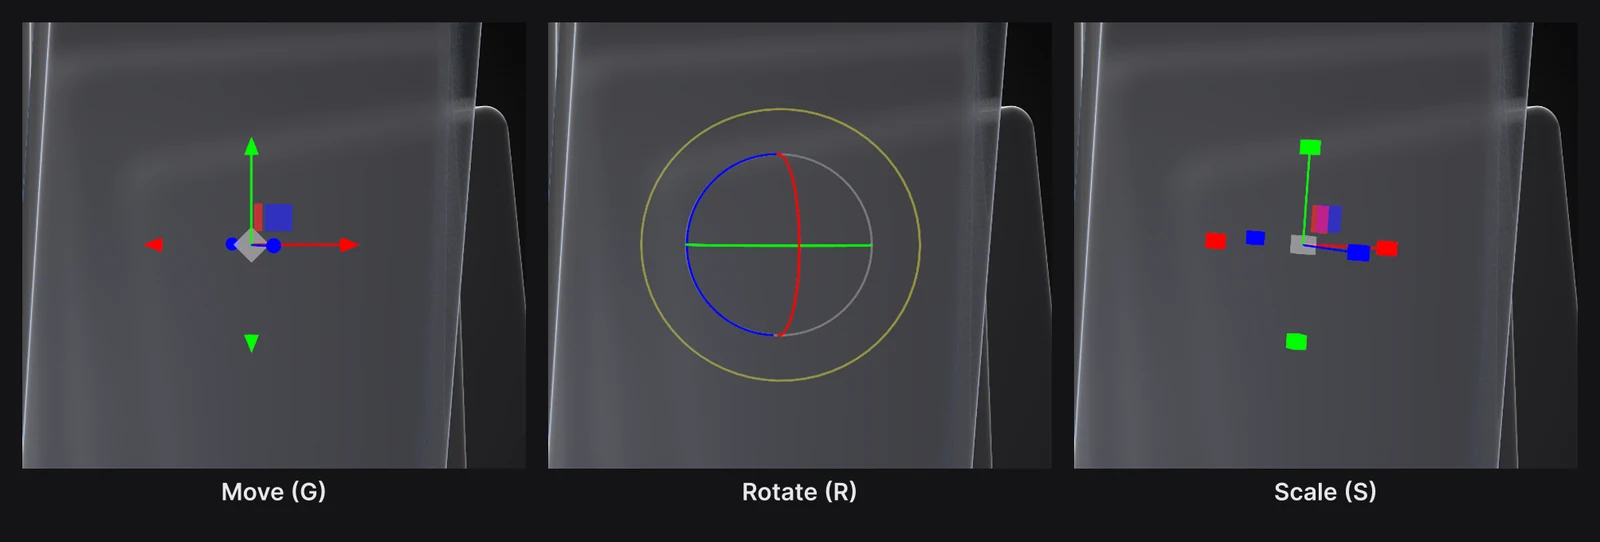
Switch gizmos with G (or M), R and S, or with the first three view controls.
- Move: drag an arrow to slide the layer along that direction.
- Rotate: drag a ring to turn the layer around that axis.
- Scale: drag a handle to stretch the layer one way, which changes a shape's width or height. Hold Shift, or drag the center handle, to scale evenly.
If the setting you change is animated, the drag adds a keyframe at the playhead. Otherwise it just changes the setting, and the drag is one step in undo.
Tip
Layers stacked on top of each other? Hold ⌥ (Alt) and click to select the layer behind the one that's selected. Click again to keep going.
Clicks on the canvas are ignored while the animation plays, so pause first (Space). To select more than one layer, use the Layers panel: Shift-click or ⌘-click the rows.
Work flat with 2D design mode
If you'd rather lay things out like a slide, press D or click 2D in the top bar. The camera turns to face the frame head-on and stays there. You drag layers by their body, smart guides snap them into line, and the arrow keys nudge them a pixel at a time. See 2D design mode.