
Quick-actions strip
The quick-actions strip is the row of icons on top of the Layers panel. It moves with the panel. It isn't a second Menu: each button opens one of Paraplex's tools in a single click.
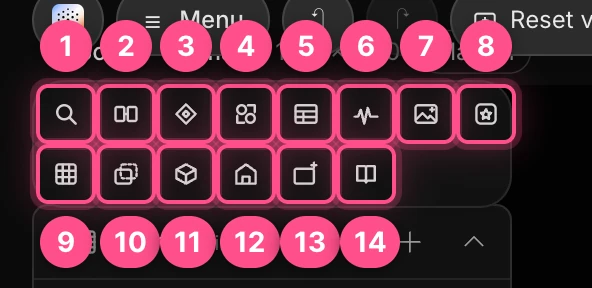
Hover any button to see its name and what it does.
| # | Button | What it opens |
|---|---|---|
| 1 | Search | The search palette (⌘ K). See Search. |
| 2 | Transitions panel | Transitions for the start and end of the piece, and for layers' clips |
| 3 | Components | The Components drawer: this project's components and your library |
| 4 | Design systems | A menu to apply one of your design systems |
| 5 | Data variants | A menu for spreadsheets: variants, charts and batch export |
| 6 | Detect beats | Markers on the beats of the selected audio clip |
| 7 | Generate image | A picture made from a description |
| 8 | Generate icon | A vector icon (SVG) made from a description |
| 9 | Generate texture | A seamless material, such as wood, plaster or paper |
| 10 | Generate overlay | A transparent light leak, sticker or cut-out |
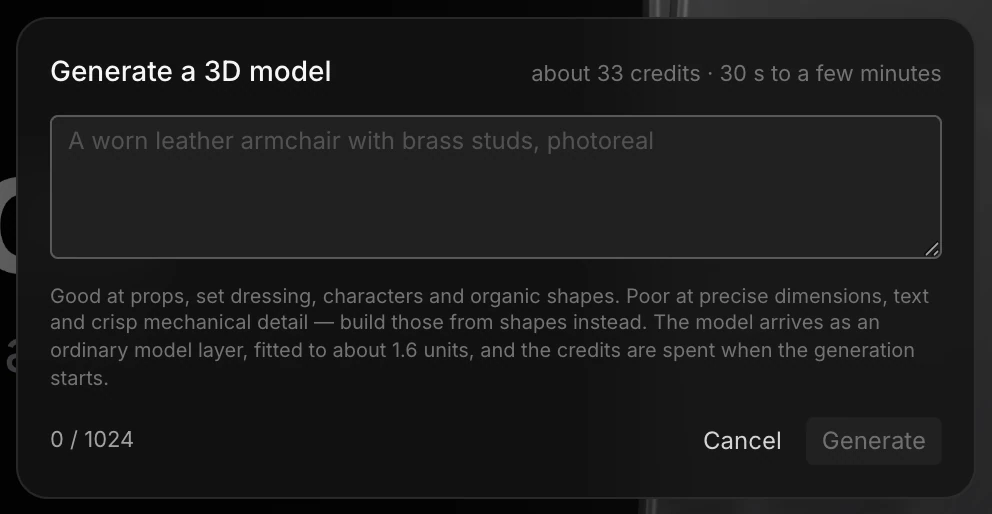
| 11 | Generate 3D model | A 3D model made from a description |
| 12 | Generate room | A walkable 3D room made from a description or a photo |
| 13 | Render with AI | A stretch of your scene restyled by an AI video model |
| 14 | Skill library | The assistant's skills |
Transitions and components
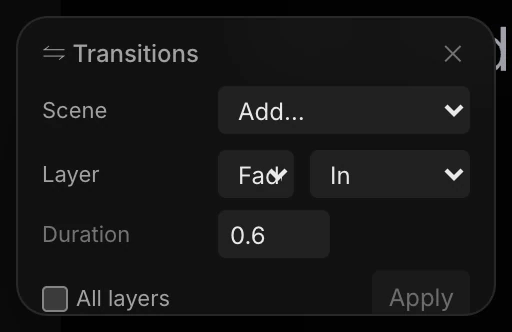
Transitions panel (2) adds a transition to the start or end of the whole piece, or to the clips of the selected layers. You can apply one to every layer at once, with a stagger between them.
Components (3) opens the Components drawer: the components in this project, their overrides, and your library, including a ready-made UI kit of buttons, inputs, cards and screens.
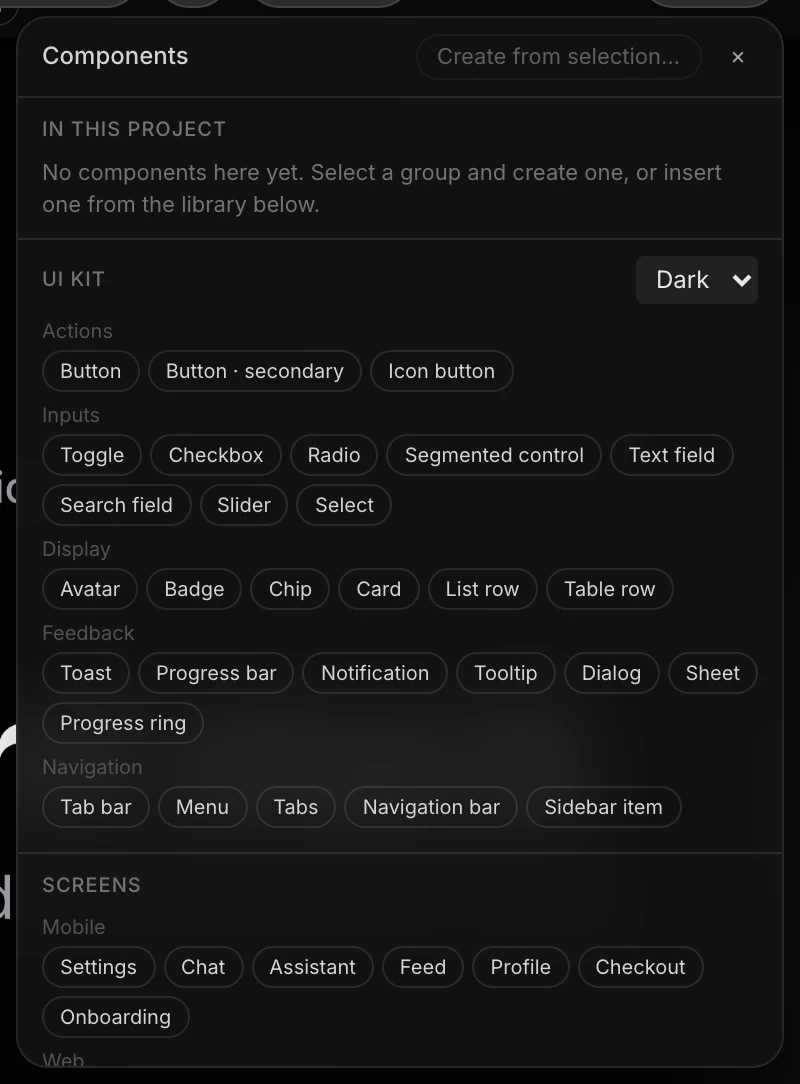
See Components.
Design systems and data
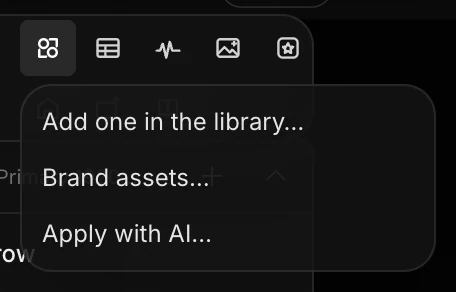
Design systems (4) opens a short menu: apply one of your saved systems, open Brand assets…, or Apply with AI… to have the assistant restyle the scene in your brand.
Data variants (5) is for spreadsheets: Import sheet (CSV)… to make one version per row, Chart from data…, and Export all variants….
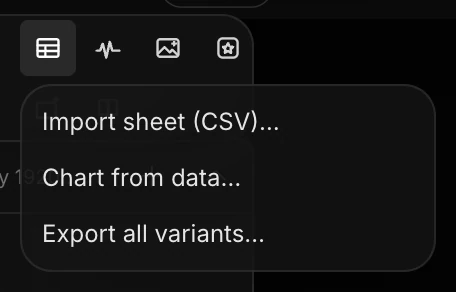
See Design systems and Data variants.
Detect beats
Select an audio clip, then click Detect beats (6). Paraplex drops a marker on each beat, and tells you the tempo it found. Clips you drag or trim then snap to the markers. It works best on music with a clear beat. See Syncing to audio.
Generate pictures
Generate image, Generate icon, Generate texture and Generate overlay (7–10) all open the same dialog, set up for a different use.
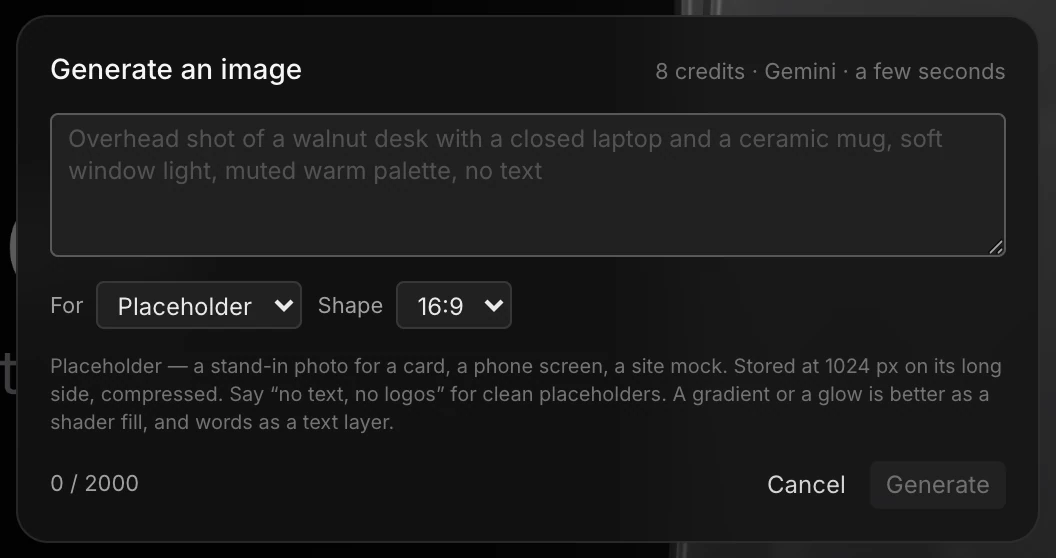
- Describe the picture you want.
- Check For: Placeholder, Photo, Background, Texture, Overlay, Icon or Illustration. Each one is tuned for that job. An icon comes back as a real SVG, and an overlay keeps its transparency.
- Pick a Shape, from 16:9 to 21:9. Textures are always square.
- If a shape or model is selected, Put it on… places the picture on it. Otherwise it arrives as a new layer.
- Click Generate, or press ⌘ Enter.
The line at the top shows what it costs in credits and how long it takes. See Generate images.
Generate 3D models and rooms
Generate 3D model (11) makes a real 3D model from a description. It takes from about 30 seconds to a few minutes, then arrives as a model layer. It's also kept under Your models in Menu › Library….
Generate room (12) makes a walkable 3D room from a description, a picture (a photo or a 360° panorama), or both. Choose Draft, Standard or Large: bigger rooms take longer. The camera starts inside the room.
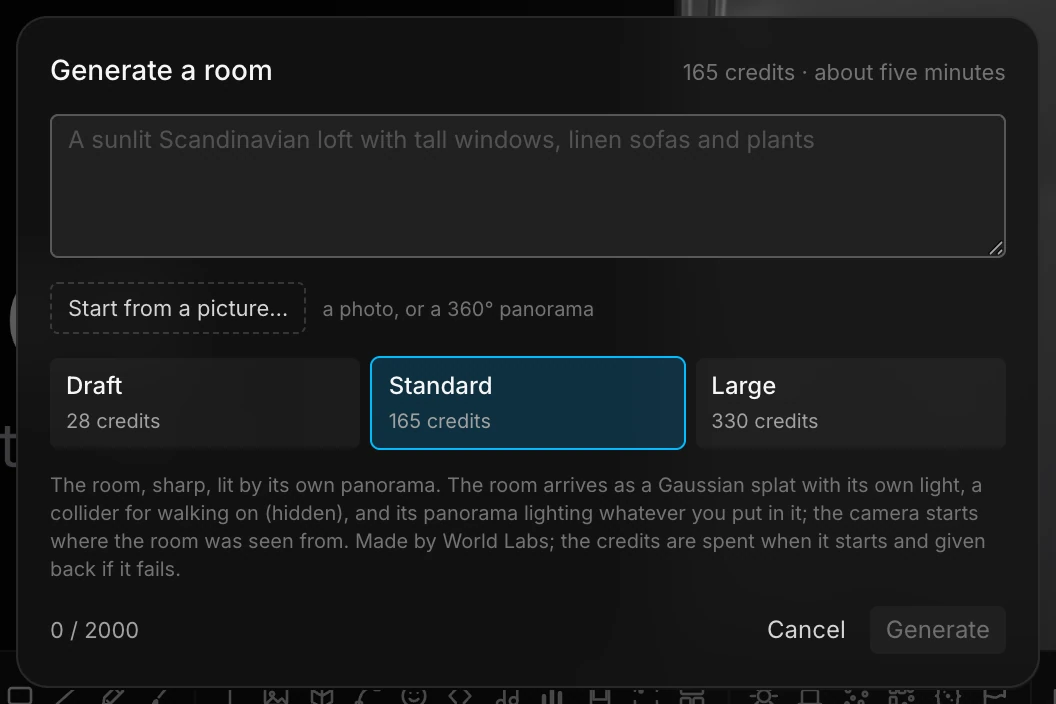
See Generate 3D models and Generate rooms.
Render with AI
Render with AI (13) takes 5 or 10 seconds of your scene and has an AI video model restyle it, keeping its layout and motion. Its other mode, Animate a picture, turns a still into a clip. The result arrives as a video layer.
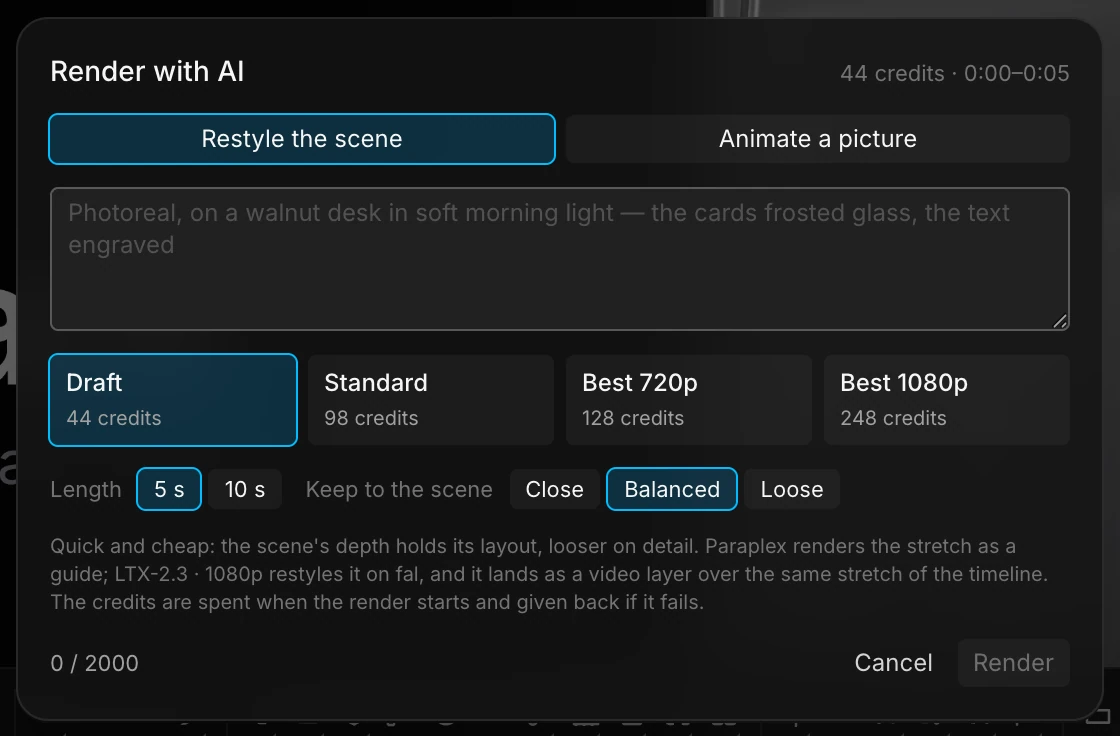
See Render with AI.
Warning
Generating spends credits as soon as it starts. If it fails, the credits come back. Each dialog shows the price before you start, and generating needs you to be signed in.
Skill library
Skill library (14) opens the assistant's skills: the built-in ones, and any you add. Upload a skill as a zip or a folder, paste a SKILL.md, create one from your brand, or have the assistant write one.
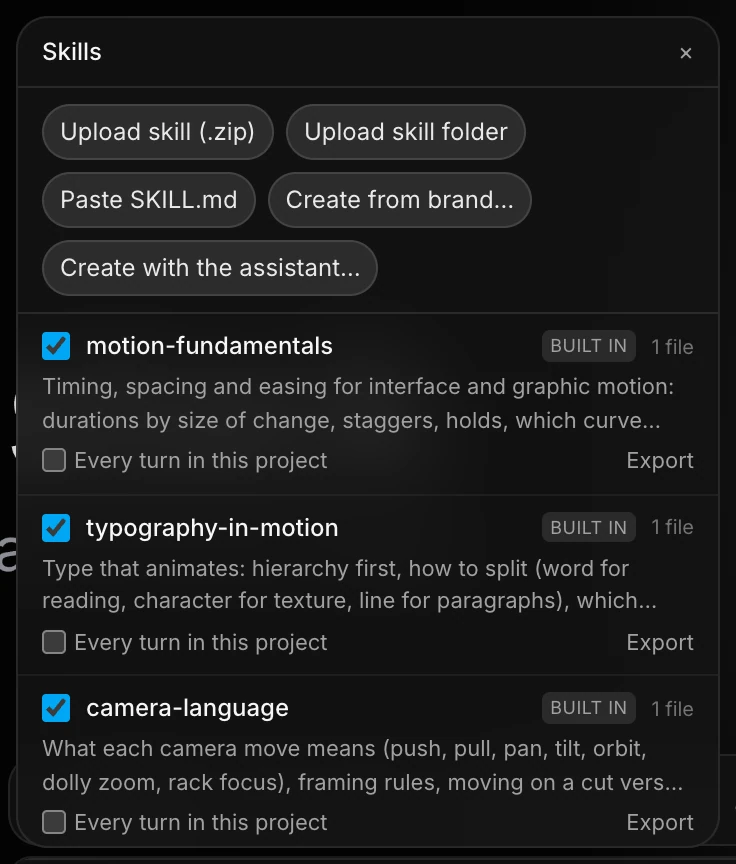
See Skills.