
Layouts and bentos
A layout arranges a group's layers in a box, with rows, columns, gaps and padding, the way a web page lays out its content. Change the box, and everything inside rearranges itself. A bento is a ready-made grid of cards to start from.
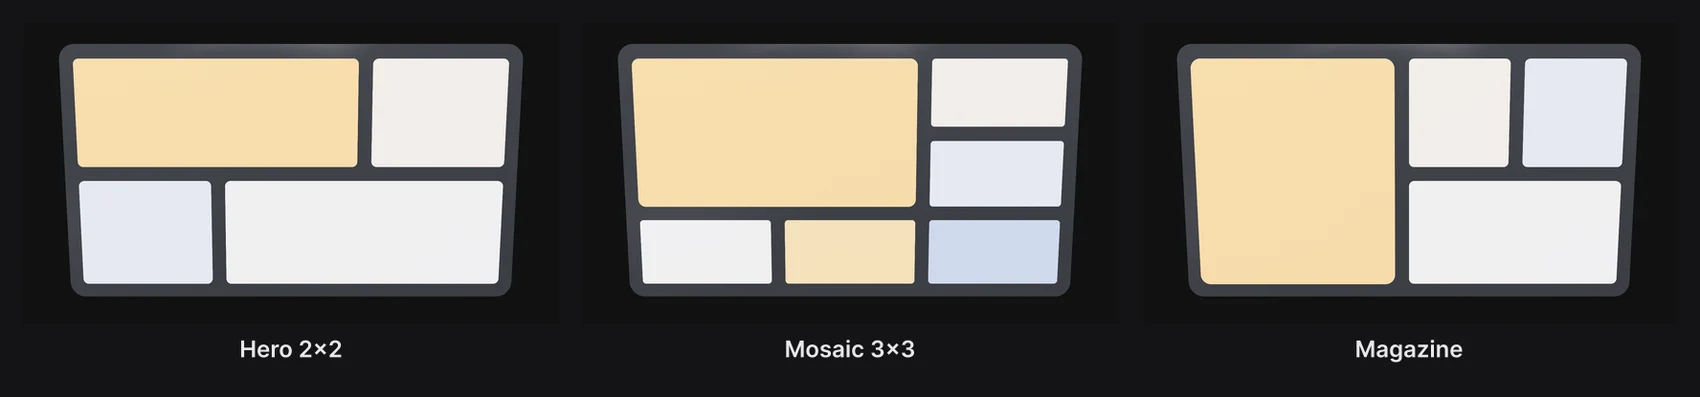
Start from a bento
Click Bento in the dock for a Hero 2×2: a wide hero card and three more. Press and hold Bento to choose Mosaic 3×3 or Magazine instead.
A bento is a group with a grid layout, holding placeholder cards ("Cell 1", "Cell 2"…) and a background card ("Frame"). Put a picture on a cell, recolor it, or drop text on it, and the grid keeps everything in place. See Images and video.
Note
Removing a bento with undo takes several presses of ⌘ Cmd+Z, one for each of its layers. To remove it in one go, delete its group in the Layers panel.
Tidy loose layers with auto layout
Add auto layout wraps layers in a group that lines them up in a row or a column, with even gaps.
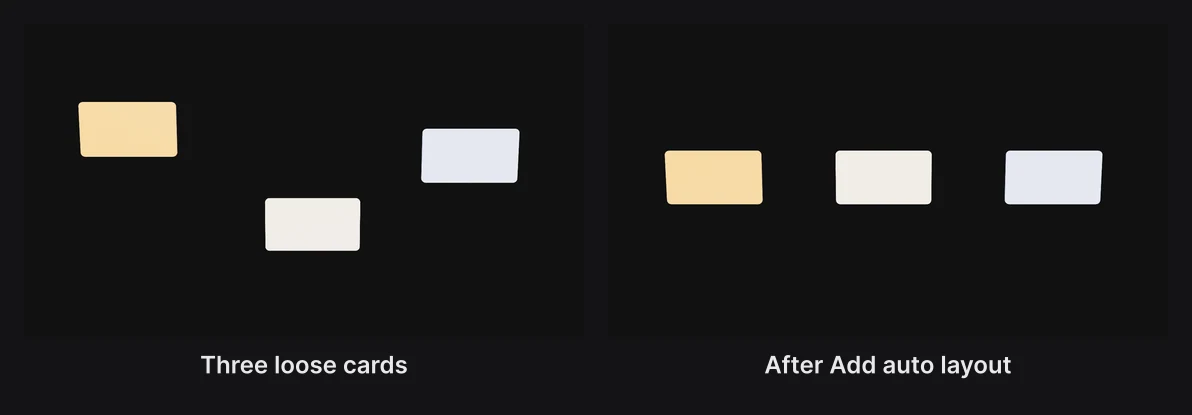
- Select the layers: click the first in the Layers panel, then ⌘ Cmd-click the others.
- In the Transform section, click Add auto layout. (Or right-click one of them and choose Add auto layout.)
Paraplex works out the rest from where the layers already are: a row if they spread wider than tall, otherwise a column, with the gap they mostly had. The new group is named "Auto layout 1". The layers must all be in the same group, or all outside any group.
The Layout section
Select a group and open its Layout section.
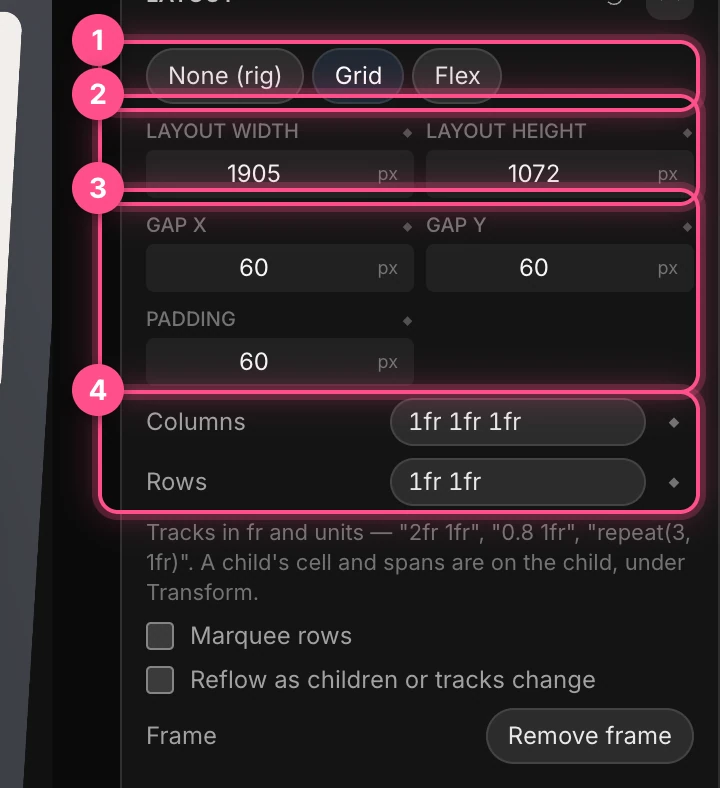
- The layout: None (rig) lets the group's rig place its layers. Grid lays them out in rows and columns. Flex lines them up in a row or a column.
- Layout width and Layout height: the size of the box, centered on the group. Like other sizes, they read in pixels; click the unit to switch.
- Gap X, Gap Y and Padding: the space between layers, and between the layers and the edge of the box.
- Columns and Rows (Grid only): how the box is divided. See Columns and rows.
Add a frame puts a background card behind the layout, always the size of its box; Remove frame takes it away.
Columns and rows
Columns and rows are written as tracks, a list of sizes, as in web design:
| You write | You get |
|---|---|
1fr 1fr | Two equal columns |
2fr 1fr | Two columns, the first twice as wide |
repeat(4, 1fr) | Four equal columns |
0.8 1fr | A fixed column 0.8 scene units wide, and one that takes the rest |
fr means a share of the space that's left. A plain number is a fixed size in scene units; a 16:9 frame is about 3.2 units across. Leave Rows empty for as many equal rows as the layers need.
Warning
Track sizes are never in pixels, even though the fields beside them read in px. 200px makes a column 200 scene units wide. Use fr, or small plain numbers.
Flex
With Flex, the layers sit in a line.
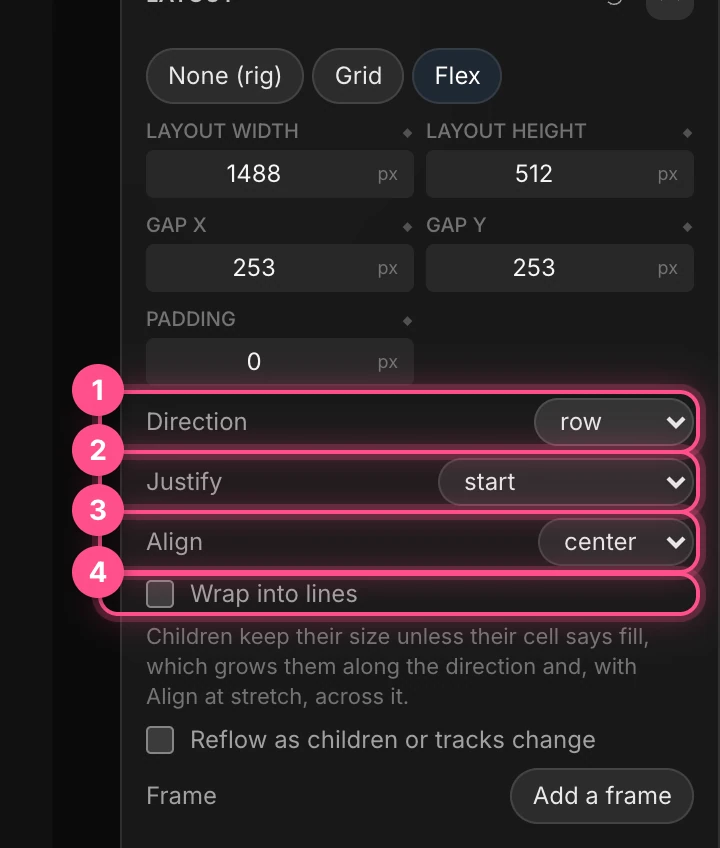
- Direction: a row or a column.
- Justify: where the layers sit along the line: at the start, center or end, or spread out with space-between, space-around or space-evenly.
- Align: where they sit across it: start, center, end, or stretch to fill it.
- Wrap into lines starts a new line when the box is full.
Each layer's cell
Select a layer inside a layout to see its Cell section.
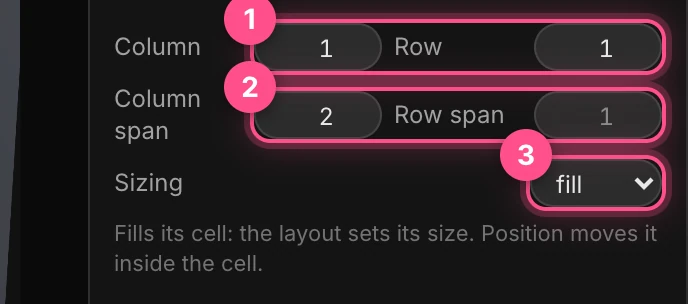
- Column and Row (Grid only) put the layer in a particular cell. Left on auto, layers fill the cells in order, row by row.
- Column span and Row span make a layer cover several cells, like a bento's hero card.
- Sizing: fill stretches the layer to its cell, fit makes it as big as the cell allows at its own proportions, and fixed keeps its size. When it doesn't fill, Justify and Align place it inside the cell.
A layer's own Position still works on top of its cell, so you can nudge it or animate it within its place.
Animate the layout
Turn on Reflow as children or tracks change in the Layout section, and the layout animates whenever it changes:
- when a layer's clip starts or ends, or a layer is hidden, the others glide to fill its place;
- when you key a change to the columns or rows, the cells glide to their new places.

Set how long the glide takes and its curve under Glide. See Clips and transitions for clips.
Most of the layout's numbers have a diamond, so you can also key them directly: the box's size, the gaps, the padding, and the columns and rows. The layout's mode, direction, justify and align can't be keyed.
Marquee rows
Marquee rows (Grid only) sets the rows running sideways, wrapping round like a ticker: a wall of logos, a strip of photos, a scrolling showcase.

| Setting | What it does |
|---|---|
| Run | Rows, sideways, or Columns, up and down |
| Marquee speed | Scene units a second. A negative speed runs the other way. |
| Marquee offset | Where the run stands. Key it, with speed 0, for a run that eases to a stop. |
| Row shift | Starts each row further along than the one above |
| Focus, Focus blur | Dims and softens the items further from the middle |
| Every other row runs the other way | On by default. Turn it off for every row to run the same way. |
Tip
A row wraps round at the edge of the box, not the frame. Make the box wider than the frame by about one item, so items appear and leave out of sight.