
A tour of the editor
The editor is where you build, animate and export. This page is a map of the screen: what each area is for, and where to look when you need something.
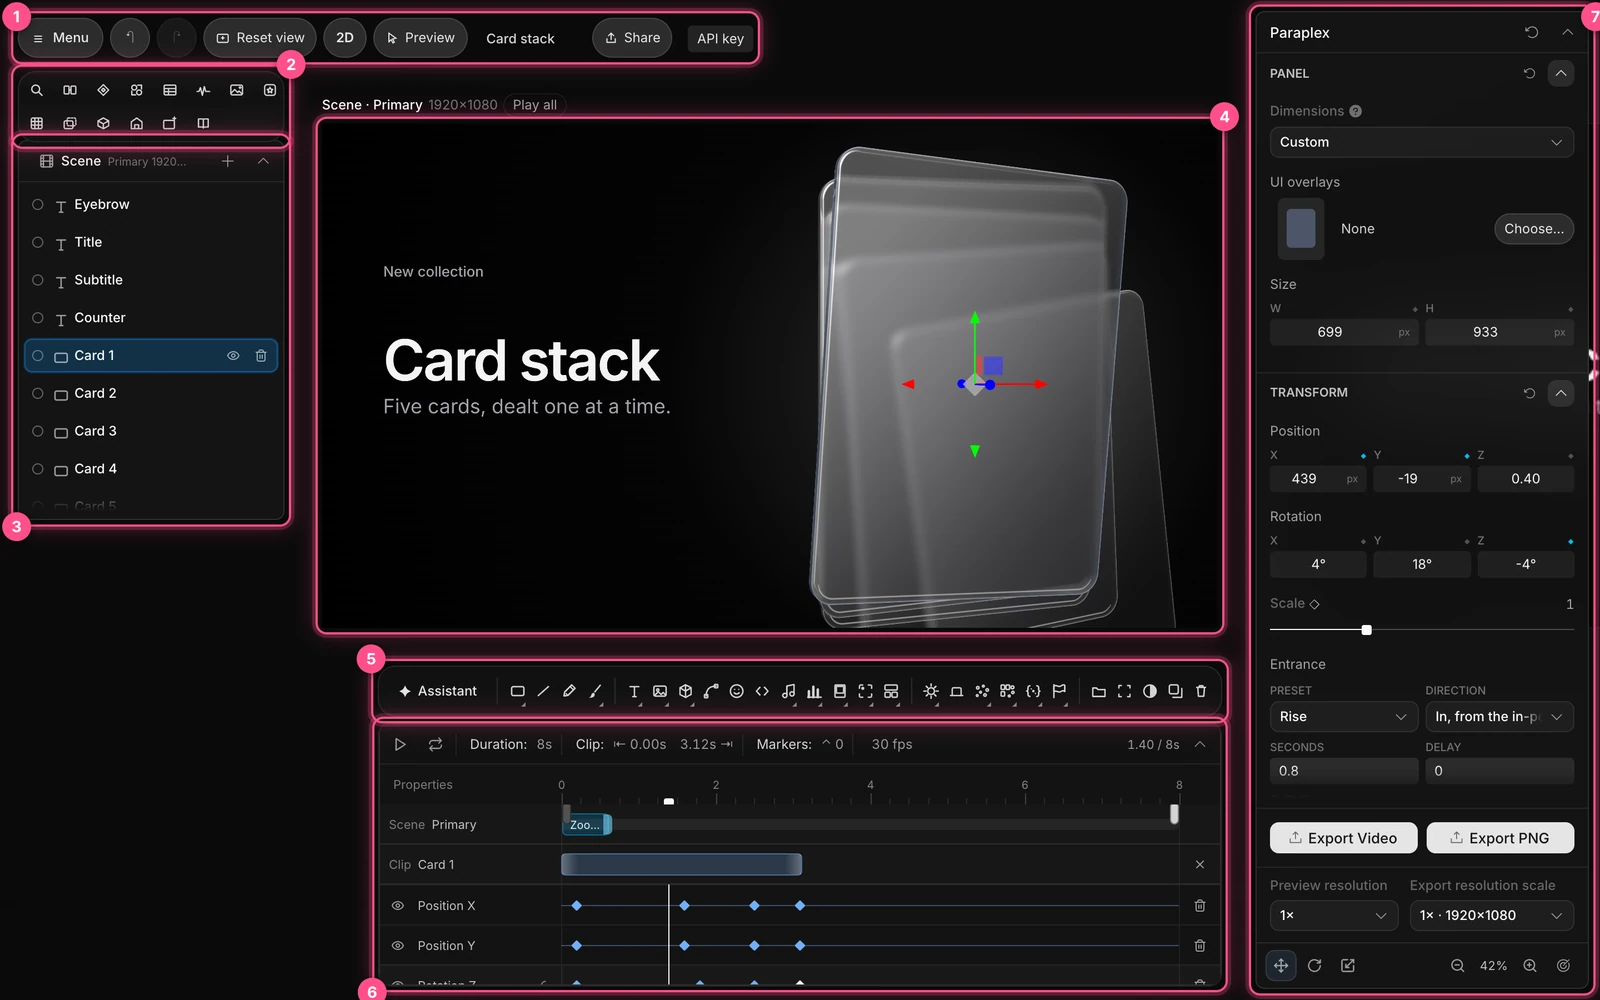
- Top bar: your project, undo, the view, Preview and Share.
- Quick-actions strip: one-click shortcuts to Paraplex's tools.
- Layers panel: everything in your scene.
- Canvas and frame: where your scene draws. The frame is what you export.
- Dock: add shapes, text, images, 3D models, lights and more.
- Timeline: play, scrub, and see keyframes and clips.
- Properties panel: settings for whatever is selected, with export at the bottom.
Tip
Want a guided version? Choose Menu › Take the tour for a six-step walkthrough inside the app.
1. Top bar

- Menu: projects, templates, export options, fonts, colors, audio and more.
- Undo and Redo: ⌘ Z and ⇧ ⌘ Z (Ctrl Z and Ctrl Shift Z on Windows).
- Reset view: puts the camera back to the scene's starting view, after you've orbited around. Shortcut: F.
- 2D: switches to 2D design mode, for laying things out flat with smart guides. Shortcut: D.
- Preview: lets you try your piece the way a viewer would, with hover, click and scroll.
- Project name: click it to rename your project.
- Share: copy a shareable link, send someone a copy, or publish an embed for a website.
The last button is Sign in. Signing in syncs your projects across devices and gives you a monthly allowance of AI credits. You can also add your own Anthropic API key there. See Saving your work.
2. Quick-actions strip
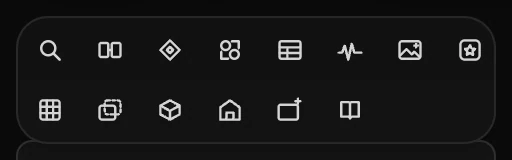
The row of icons above the Layers panel opens Paraplex's tools in one click. Hover an icon to see its name.
| Row | Buttons, left to right |
|---|---|
| Top | Search, Transitions panel, Components, Design systems, Data variants, Detect beats, Generate image, Generate icon |
| Bottom | Generate texture, Generate overlay, Generate 3D model, Generate room, Render with AI, Skill library |
The Generate buttons and Render with AI use AI to make pictures, models, rooms and video, which uses credits. See AI credits and keys.
3. Layers panel
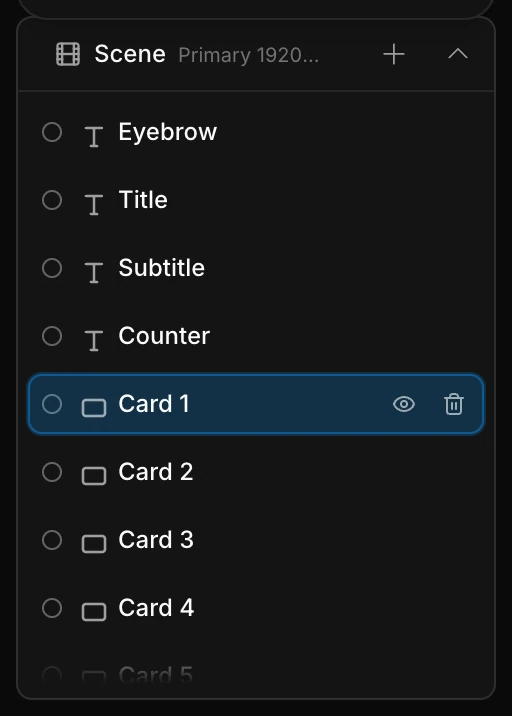
Every layer in your scene is listed here. A layer is anything you add: a shape, a word, a picture, a light.
The list is for finding and organizing layers. It doesn't decide what's in front: in a 3D scene, a layer closer to the camera covers one behind it. See Layers panel.
- Click a layer to select it. Its settings appear in the properties panel.
- Shift-click or ⌘-click to select more than one.
- Drag a layer up or down to reorder it.
- Hover a layer to show its eye (hide) and trash (delete) buttons.
- Right-click for more: duplicate, rename, isolate, add a transition and so on.
- Click Scene at the top of the list for settings that apply to the whole scene: canvas size, background, lighting and camera.
Learn more in Layers panel.
4. Canvas and frame
The canvas fills the middle of the screen. The frame is the rectangle labeled with your scene's name and size, such as Scene · Primary 1920×1080. Whatever is inside the frame is what you export.
- Click a layer on the canvas to select it. Arrows appear on it so you can drag it into place.
- Double-click text to type over it.
- Drag across the frame to orbit the camera around your scene, because every Paraplex scene is 3D. This moves the scene's real camera, so press F (Reset view) to put it back.
- Scroll to move the view around, and pinch or Ctrl-scroll to zoom in and out. These only change your view of the canvas, not your scene.
See Moving around the canvas for the details.
5. Dock

Everything you add to a scene starts here.
- Assistant: opens the AI assistant.
- Shapes and drawing: shapes (called panels), lines, the pen and the brush.
- Content: text, images, 3D models, vectors (SVG), icons, code, audio, charts, media frames, HUDs and bento layouts.
- Scene: lights, a backdrop, particles, formations, generators and physics objects such as a flag.
- Organize: build a scene from a folder of files, group layers, add an adjustment layer, make an instance of a group, or clear the scene.
A small triangle in a button's corner means it has a family of related tools. Press and hold the button to choose one.
To add a shape, click its button, then drag on the canvas to draw it at the size you want. A single click drops it at its default size. Learn more in The dock.
6. Timeline
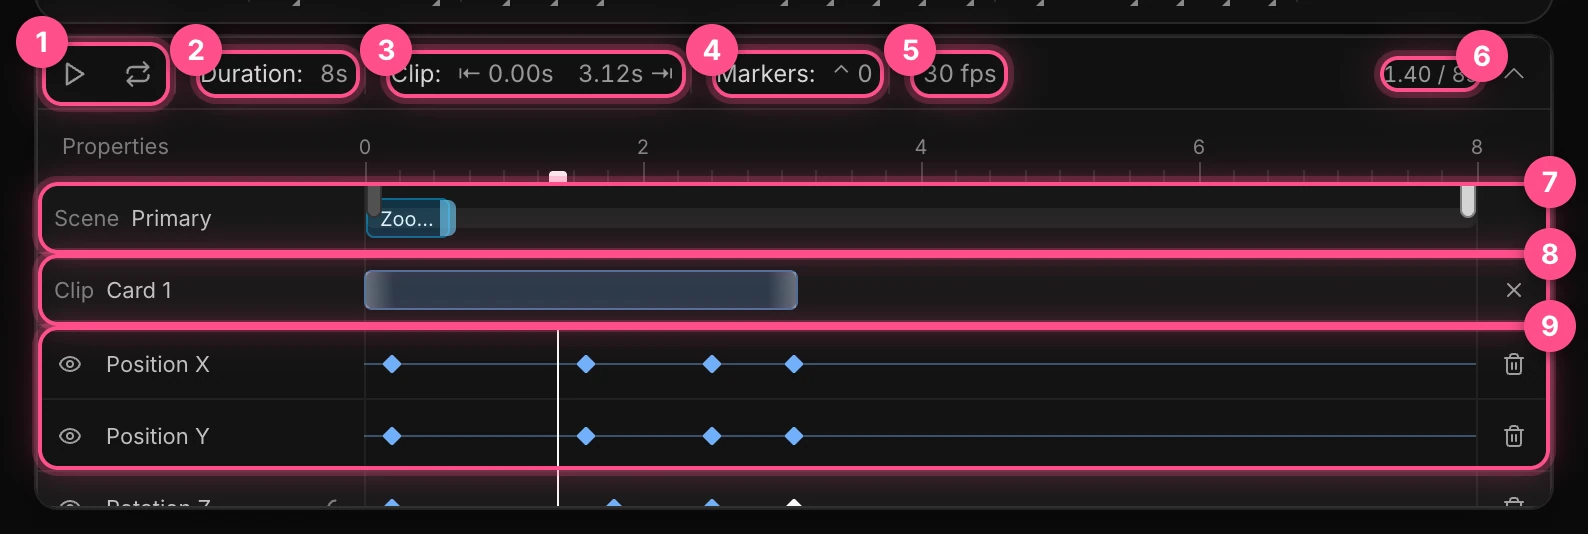
- Play and Loop. Space also plays and pauses.
- Duration: how long your piece is. Click the number to change it.
- Clip: the selected layer's start and end. The two buttons set them to the playhead.
- Markers: add a marker at the playhead to mark a beat or a moment.
- Frame rate, such as 30 fps. Click it to change.
- Current time and total length.
- Scene row: the whole piece, with any transitions at its start and end. It appears once the piece has a scene transition.
- Clip row: the selected layer's clip. Drag its ends to change when the layer appears and disappears.
- Keyframe lanes: one row for each animated setting. Each diamond is a keyframe, a saved value at a moment in time.
The white line is the playhead, the moment you're looking at. Drag its handle on the ruler, or click anywhere in the rows, to move through time. With nothing selected, the timeline lists every layer instead.
Learn more in The timeline.
7. Properties panel
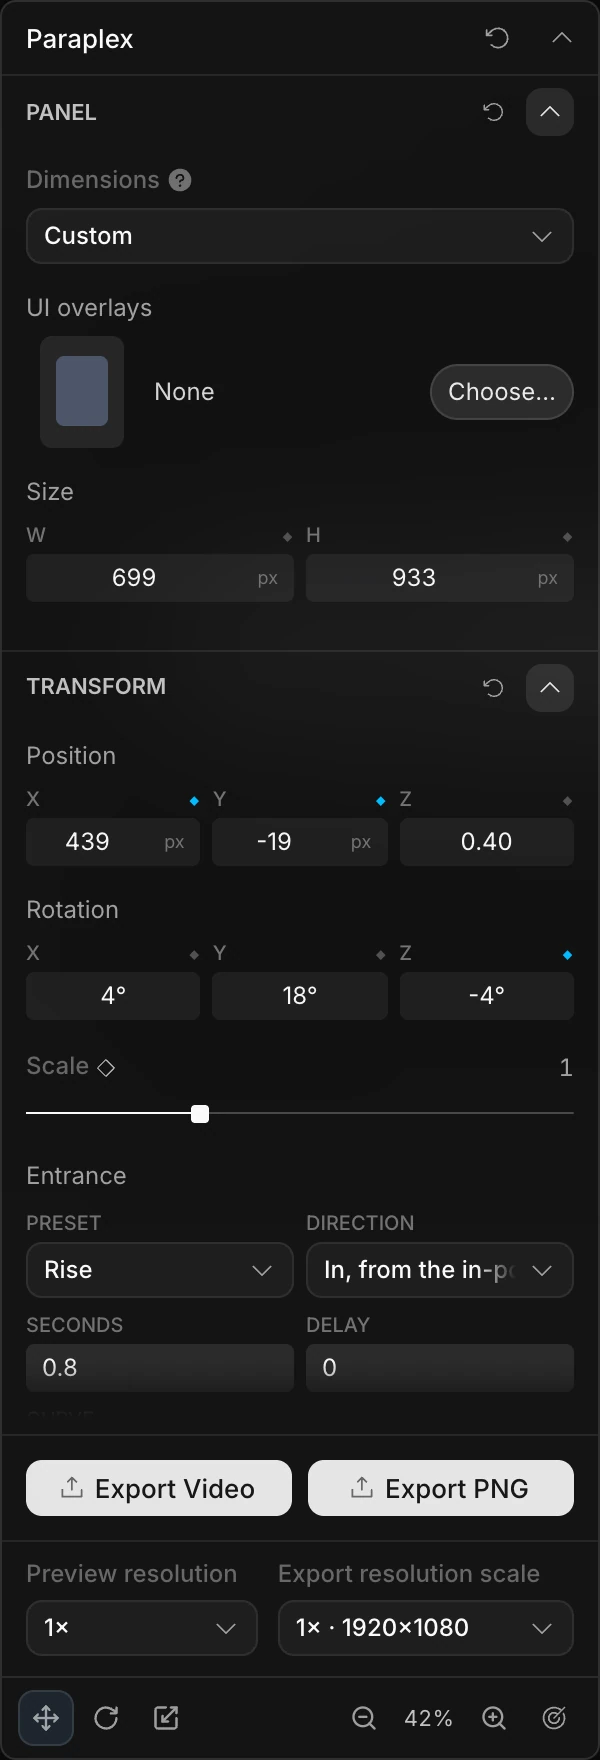
The properties panel shows the settings for whatever you've selected, grouped into sections such as Transform (position, rotation and scale).
- Click a section's arrow to fold it away, or its ↺ button to reset it.
- Click the small diamond beside a setting to add a keyframe for it. That's how you animate anything. See Animation basics.
- With nothing selected, the panel shows the export settings.
- Text layers also get a floating Text settings panel under the frame, for the font, size and color.
At the bottom of the panel, always in reach:
- Export Video and Export PNG
- Preview resolution, which sets how sharp the preview is, and Export resolution scale, which sets the size of your exports
- The gizmo modes (Move, Rotate, Scale) and the canvas zoom controls
The assistant
Click Assistant at the left end of the dock to open it. Describe what you want, such as a scene, a change or an animation, and the assistant builds it. You see what it did before you keep it. It has three tabs: Chat, Feedback and Skills.
You can use it straight away, even signed out, within a free allowance. Sign in for a monthly allowance of credits, or add your own Anthropic API key. See Meet the assistant.